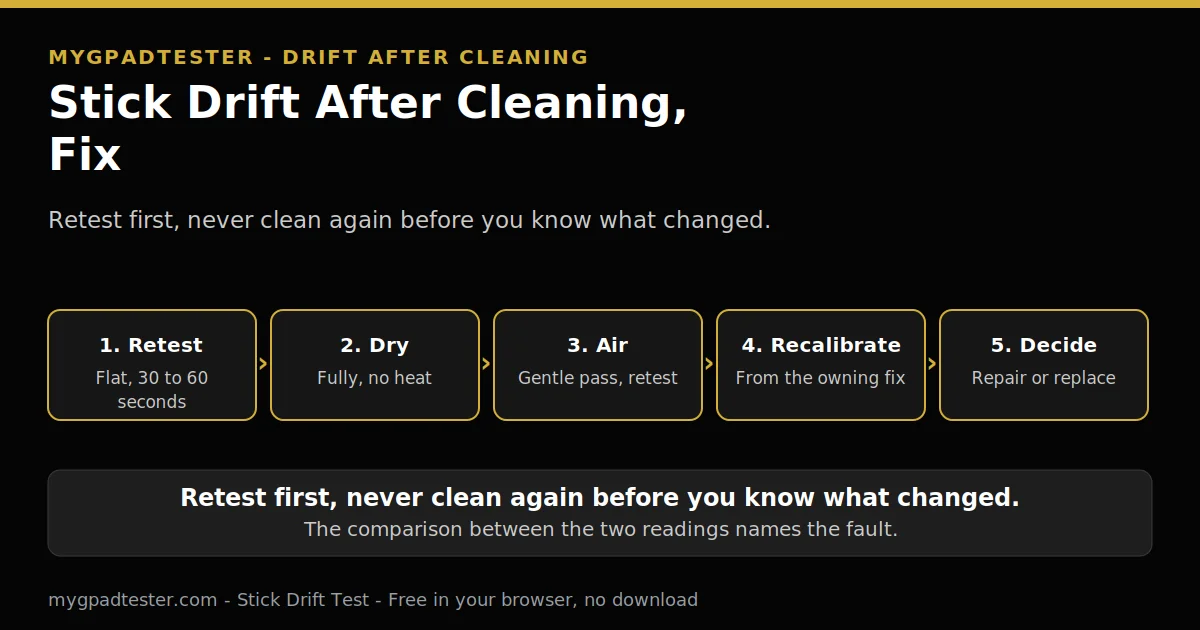
You cleaned the controller to fix the drift, and now it drifts worse? The stick that was only a little off now sits off center, or jumps around when untouched. Cleaning can move the fault, not only the dirt. Retest first, then follow the recovery order below.
Last updated: 13 November 2026 | Category: Controller Issues & Fixes | Reading time: about 8 minutes | Tested with Chrome/Edge, Gamepad API
Quick Answer
Retest first, do not clean again yet. Dry the controller fully, then check what the cleaning moved: debris pushed deeper, cleaner residue, a spring nudged out of place, or a worn part the clean disturbed. Recalibrate, bridge mild drift with a deadzone setting, and retest the same reading after each step.
Retest the stick first
No download. No account. Data stays in your browser.
Cleaning can move the fault, not only the dirt
Cleaning can move debris deeper, leave residue, or disturb a worn part. Drift after cleaning is a real pattern with its own recovery order, and the first step is always a retest, not a second clean. This post is a recovery guide, not a lecture. No one is blamed for cleaning. The cleaning did not necessarily cause the wear; it may only have exposed wear that was already there.
Read every result on the house drift scale, labelled tester convention every time, never a vendor specification. Flickers within 0.02 to 0.03 is normal noise. A steady offset of 0.05 to 0.10 is mild. Above 0.10 or creeping is clear drift. What drift is explains the fault itself. Why drift happens with hands off is the diagnosis post.
Press any button to wake the Gamepad API. A blank test before any press is normal. The browser cannot test what the operating system does not see. Fix the OS connection first, then retest in the browser.
This post owns only what cleaning may have moved and the recovery order. It does not re-teach the full clean procedure from the platform drift fixes. Those posts own their clean steps.
Retest first: the after-cleaning number
Test flat and untouched for 30 to 60 seconds, record stick, direction, value, connection, browser, and the after-cleaning number. Compare it with the before-cleaning number if one was recorded. If no before number exists, the post says so plainly and uses the house scale alone. A missing before number is not a failure; it only means the scale alone decides. The drift test method owns the method in depth, and this post does not re-teach it.
Read the result on the house scale above, tester convention every time. Normal noise needs no fix. Mild drift means dry, check what moved, recalibrate, bridge, retest, monitor. Clear drift means dry, check what moved, recalibrate, bridge, then the repair versus replace decision. Random jumps mean debris, a loose stick, or a failing sensor. Dry, gentle air, retest wired, then decide.
Do not clean again before this retest. A second clean before a retest hides what the first clean changed. The retest is what turns a feeling into a number you can act on.
What cleaning may have moved
Four things cleaning may have moved, one row each. These are Tier 3 typical patterns, not a measured diagnosis, and the retest decides which one fits.
| What may have moved | What the reading looks like | What to do next |
|---|---|---|
| Debris pushed deeper under the stick base | Random jumps, even untouched | Gentle compressed air pass around the stick base, then retest |
| Contact cleaner residue on the sensor track | Offset that changes as it dries | Dry fully, no heat, then retest only when dry |
| Return spring nudged out of place | Offset after push and release, clears when nudged back | Full deflection sweep and return to center watch, then retest |
| Worn wiper disturbed by the clean | Steady offset that stays after dry plus air plus recalibration | Recalibrate, deadzone bridge, then repair versus replace decision |
A steady offset that stays after dry plus air plus recalibration means the cleaning exposed wear that was already there, not damage the cleaning caused on a healthy stick. Cleaning helps debris, not worn hardware.
The recovery order: dry, air, recalibrate, bridge, decide
Six layers, in order. Allow about 20 minutes, including drying time after cleaning. Work them in order, one variable at a time, retest after each one. A fix you cannot measure is a guess.
1. Retest first. Done in the section above. Flat and untouched, 30 to 60 seconds, record stick, direction, value, connection, browser, after-cleaning number. This is the baseline the recovery compares against. Retest.
2. Dry fully. If any liquid cleaner was used, power off, leave the controller to dry fully before any further test, and do not use heat. Never test a wet controller. Retest after drying with the same method. One variable at a time. Retest.
3. Check what the cleaning moved. Work the table above in order. Debris pushed deeper gets a gentle compressed air pass around the stick base, then a retest. Residue gets more drying time, then a retest. A spring nudged out of place gets a full deflection sweep and a return to center watch, then a retest. No flooding, no WD-40 or household cleaners. Stop for swollen battery, heat, smell, or damage. Never open the controller in this guide. Retest.
4. Recalibrate after cleaning. Use the platform calibration from the owning fix post, then retest the same reading. For a Joy-Con, use the Joy-Con fix. For a DualSense, use the PS5 DualSense fix. For an Xbox controller, use the Xbox fix. For a DualShock 4, use the DualShock 4 fix. Calibration resets the center point. It does not repair worn hardware. Retest.
5. Deadzone bridge: hide mild drift, not a fix. A deadzone bridge hides mild drift, it does not repair it. Use an in-game deadzone setting or a Steam Input deadzone. Start with resting plus 0.01 as a starting guide, and outer 0.95 to 0.98 as a starting guide. Stop raising the deadzone at 0.20 and move to the repair versus replace decision. Set the deadzone per stick separately. Retest.
6. Decide: retest unchanged after dry plus air plus recalibration means wear was already there. If the retest stays unchanged after dry, air, and recalibration, the cleaning exposed wear that was already there. Check the warranty before any opening step, and contact the vendor support for repair options while covered. Use iFixit as the repair route authority. This post gives no opening instructions. Run the full health check to see every component in one place before you decide. Retest.

- Retest first, flat and untouched, 30 to 60 seconds, record the after-cleaning number.
- Dry fully, power off, no heat, never test a wet controller, retest only when dry.
- Gentle air pass around the stick base, then retest.
- Recalibrate from the owning fix post, then retest the same reading.
- Deadzone bridge for mild drift only, resting plus 0.01 as a starting guide, stop at 0.20, retest.
- Decide, retest unchanged after dry plus air plus recalibration means wear was already there.

| Reading | Before cleaning | After cleaning | What it means |
|---|---|---|---|
| Flickers within 0.02 to 0.03 | Normal noise | Normal noise | No drift, monitor |
| Steady offset 0.05 to 0.10 | Mild drift | Mild drift, same value | Cleaning changed nothing, wear or calibration offset |
| Steady offset above 0.10 | Clear drift | Clear drift, same value | Wear, recalibrate, bridge, then decide |
| Offset worse after cleaning | Mild or none | Steady offset or random jumps | Cleaning moved debris, residue, or a worn part |
| No before number recorded | Not recorded | Any reading | The house scale alone decides, tester convention |
How to fix stick drift after cleaning
Total Time: 20 minutes
Retest first
Retest first, flat and untouched, 30 to 60 seconds, record the after-cleaning number. Retest.
Dry fully
Dry fully, power off, no heat, never test a wet controller, retest only when dry. Retest.
Gentle air pass
Gentle air pass around the stick base. Retest.
Recalibrate
Recalibrate from the owning fix post. Retest.
Deadzone bridge
Deadzone bridge for mild drift only, resting plus 0.01 as a starting guide, stop at 0.20. Retest.
Decide
Decide, retest unchanged after dry plus air plus recalibration means wear was already there. Retest.
Still drifting after the recovery order
The reading is unchanged after dry, air, and recalibration. That is useful information, not a failure. Retest unchanged after dry plus air plus recalibration means wear was already there. Go to layer 6, check the warranty, and contact the vendor support for repair options while covered. Do not keep cleaning a worn stick. Cleaning helps debris, not worn hardware.
The offset changed as it dried, then settled back to the before number. That was residue, not wear. The cleaner left a film on the sensor track that cleared as it dried. The reading that settles back to the before number means the cleaning did not make anything worse. Monitor it, and retest if the fault returns.
The stick still jumps randomly after cleaning and drying. Random jumps while untouched mean debris, a loose stick, or a failing sensor. Retest wired as the control run. If the jumps survive the clean and the wired retest, the sensor or the stick assembly is the suspect, and the repair versus replace decision is next.
The Joy-Con drifts after cleaning and the other Joy-Con does not. That is a fault in that Joy-Con, not in the Switch. Test each Joy-Con separately and recover only the drifting one. The Joy-Con fix is the owning post for Joy-Con steps.
What this recovery cannot do
This recovery cannot repair worn hardware. Drying removes residue. A gentle air pass clears debris. Recalibration resets the center point. A deadzone bridge hides mild drift. None of these restores a worn resistive contact pad. A reading that stays above 0.10 after dry, air, recalibration, and bridge is wear, and the honest next step is repair or replacement, not another round of cleaning.
This recovery does not teach the full clean procedure. The platform drift fixes own their clean steps. This post owns only what cleaning may have moved and the recovery order. Do not open the controller on the strength of this post.
This recovery does not cover a controller the browser cannot see. Detection comes first, drift second. A browser test reads through the Gamepad API, so every result here is browser observed. Test in Chrome or Edge, use the same browser for every retest you compare, and keep the pad awake during each run.
Related Tools
- Polling Rate Test
- Vibration Test
- Trigger Test
- Stick Drift Test (pillar, highlighted)
- Stick Deadzone Test
- Button Test
- Input Lag Test
- Gamepad Health Checker
Related Guides
- What Is Controller Stick Drift?
- How to Test Stick Drift Online
- PS5 DualSense Stick Drift Fix
- Xbox Series Stick Drift Fix
- Nintendo Switch Joy-Con Drift Fix
- Why Does My Controller Drift Without Touching It?
- PS4 DualShock 4 Stick Drift Fix
About the Author
Marcus Sterling, Lead Engineer and Founder of MyGpadTester, Austin, Texas. Profile: https://mygpadtester.com/marcus-sterling/ X: https://x.com/marcussterlin
Retest first, dry fully, then work the order. The comparison between the two readings names the fault.
Frequently Asked Questions
Why did cleaning make my controller drift worse?
Cleaning can move debris deeper, leave residue, or disturb a worn part. Retest first, then follow the recovery order.
How long should I let a controller dry after cleaning?
Dry fully before any further test. Use no heat, and retest only when dry. This post gives no hour count, because drying time depends on how much cleaner was used.
Should I clean it again?
No, not before a retest. A second clean before a retest hides what the first clean changed.
My Joy-Con drifts after cleaning, is it the same fix?
Same recovery order, with Joy-Con specific steps from the Joy-Con fix.
Cleaning did not help and recalibration did not help, what now?
Retest unchanged after dry plus air plus recalibration means wear was already there. Check the warranty, contact the vendor support for repair options while covered, and use iFixit as the repair route authority. This post gives no opening instructions.
Can cleaning damage a controller?
Aggressive cleaning can disturb a worn wiper or spring. Use gentle air and a small amount of suitable cleaner, dry fully, and follow the safety warnings in this post.
Next Steps
If the reading improved after one layer, stop there and monitor it. If it is unchanged after dry, air, and recalibration, work the deadzone bridge, then the repair versus replace decision. If the whole controller is blank in the test, fix detection first and come back to this guide after. Do not clean again before you retest.