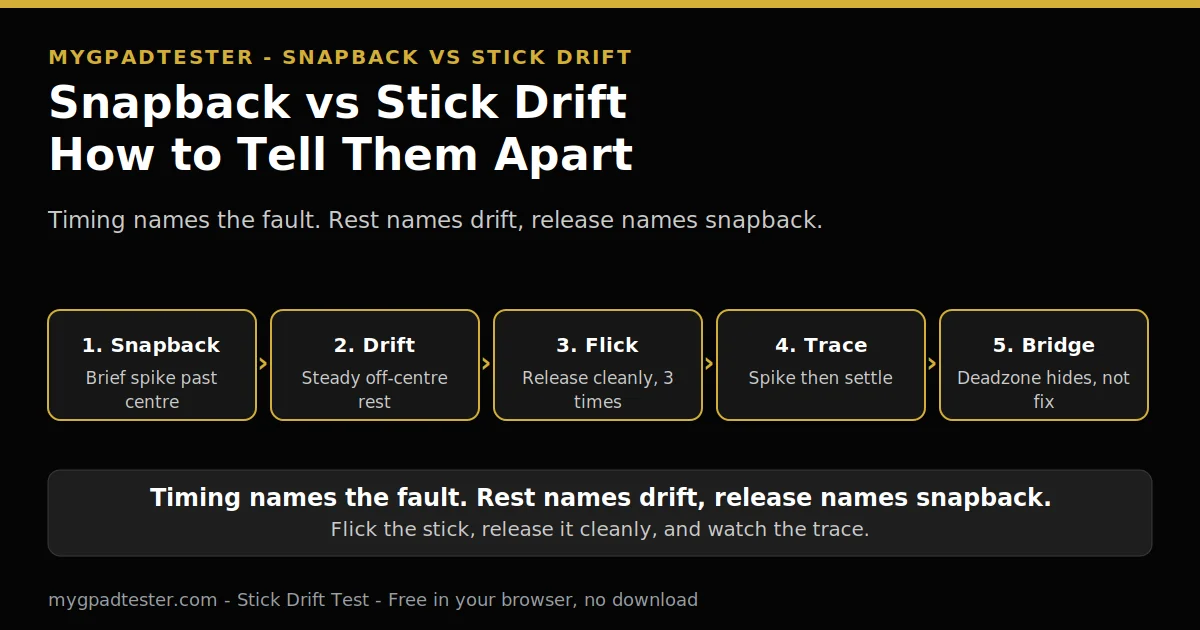
Your aim bounces past the target right after a fast flick?
Last updated: 14 November 2026 | Category: Controller Issues & Fixes | Reading time: about 8 minutes | Tested with Chrome/Edge, Gamepad API
Quick Answer
Snapback is a brief overshoot past centre right after you release the stick. Drift is a steady offset that stays while your hands are off. Flick the stick, release it cleanly, and watch the trace. A spike past centre that settles means snapback. A reading that stays off centre means drift.
run the flick and release test
No download. No account. Data stays in your browser.
Snapback and drift look alike in play, and they need different fixes. That is why the test must split them by timing, not by feel. What drift is is a steady offset that stays while the stick is untouched. Snapback happens only in the moment after release.
Read every rest reading on the house drift scale, labelled tester convention every time, never a vendor specification. Flickers within 0.02 to 0.03 is normal noise. A steady offset of 0.05 to 0.10 is mild. Above 0.10 or creeping is clear drift. Random jumps while untouched mean debris, a loose stick, or a failing sensor.
What snapback is
Snapback is the stick overshooting the centre point after release. A spring pulls the stick back to centre, and in practice it oscillates around the centre point for a brief period (Tier 3, community firmware source). On some controllers the overshoot is big enough that the stick exits the deadzone on the other side of centre. If it is polled at the right time, this gives an input in the direction opposite to where the stick was released from. That brief wrong-direction input right after release is the snapback symptom in play.
Say this plainly: no vendor documents snapback. A search on 12 Nov 2026 found no Sony, Microsoft, or Nintendo support page on it. Their support covers drift, reset, and calibration, not snapback. The mechanism is Tier 3 typical, and this post treats it that way. The definition here comes from the OpenGCC snapback wiki, a Tier 3 community firmware source.
Wear plays a part too. The severity in a stock controller depends on both potentiometer degradation and joystick wear (Tier 3, OpenGCC). Worn potentiometers may not read the physical snapback motion properly. A loose centre area in a worn stick can make the physical snapback more severe.
Rest vs release: the contrast that names it
The rest reading names drift. The release reading names snapback. Timing is the whole test. Read the table, then run the test that matches your row.
| Reading | What it means | What to do next |
|---|---|---|
| Rest steady at centre, only release shows a spike | Snapback | Run the flick and release test, then bridge with deadzone if it breaks play |
| Rest sits off centre and stays there | Drift | Work the drift side first, then retest |
| Rest off centre and release also spikes | Both faults | Test both, fix the worse one first, retest after each change |
| Rest flickers within 0.02 to 0.03 | Normal noise | No fix needed, monitor |
The house drift scale is a tester convention, not a vendor specification. Some other testers use above 0.15 as their replace threshold. This site uses the scale above for consistency.
A rest reading that sits off centre needs the full rest procedure. That procedure belongs to Why Does My Controller Drift Without Touching It? This post does not repeat it. For the test method itself, see the drift test method.
How to run the flick and release test
Open the Stick Drift Test in Chrome or Edge. Press any button to wake the Gamepad API. A blank test before any press is normal. If the pad never appears, fix the OS connection first. The browser cannot test what the operating system does not see.
Push one stick to full deflection. Release it cleanly, without guiding it back. Watch the return-to-centre trace as it settles. Repeat the flick three times on the same stick, then test the other stick the same way. Record the stick, the direction, the value, the connection, and the browser each time.
This is house test logic, Tier 3, built from the facts in this post. No source states this exact procedure, and this post does not claim one does. The full USB test setup belongs to How to Test a USB Gamepad Online.
What the trace means
A brief spike past centre into the opposite direction, then a settle at centre, is snapback. A steady offset that stays after the stick has settled is drift. If you see both patterns, test both and fix the worse one first. Retest after each change, with the same reading in the same browser on the same connection, one variable at a time.
The browser reads stick axes through the Gamepad API. Axes are normalised to -1.0 to 1.0 (Tier 1, W3C Gamepad API). The spec defines a preferred axis state with a centre position value for an axis designed to return to centre. That is the spec basis for reading a return-to-centre trace in the browser.
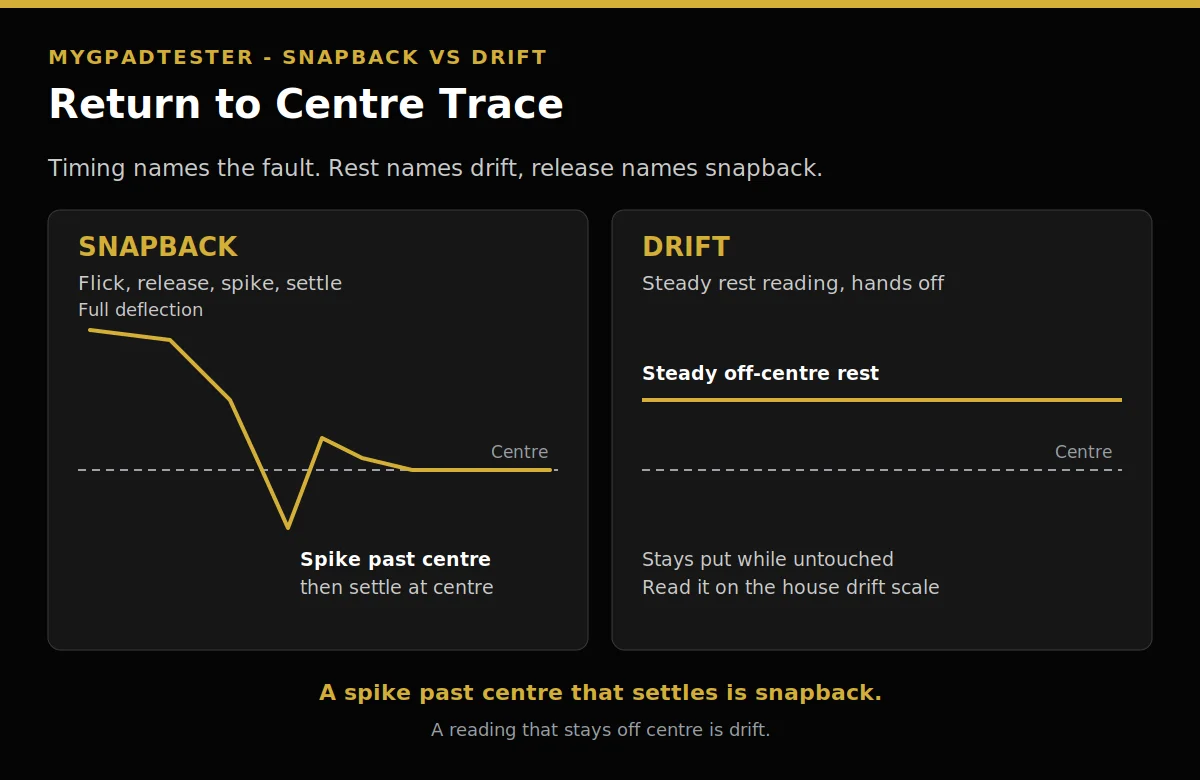
Note: the contrast table above is the text version of this visual.
Why deadzone hides snapback but does not fix the spring
A deadzone set wider than the overshoot makes the overshoot invisible to the game. The game never sees the input, so play looks clean. The spring still overshoots. That is the whole bridge: it hides snapback, it does not fix it. OpenGCC states the same logic (Tier 3). All controllers technically experience snapback, but it is not always severe enough to affect gameplay. If the stick never leaves the deadzone, there will be no negative effect.
What a deadzone is matters here, because the bridge only works if the deadzone is set right. Start with resting plus 0.01 as a starting guide, and outer 0.95 to 0.98 as a starting guide. Stop at 0.20 and move to the repair versus replace decision. Set the deadzone per stick separately. The foundation post above owns the full setup, so this post does not repeat it. To check your own setting, test the deadzone.
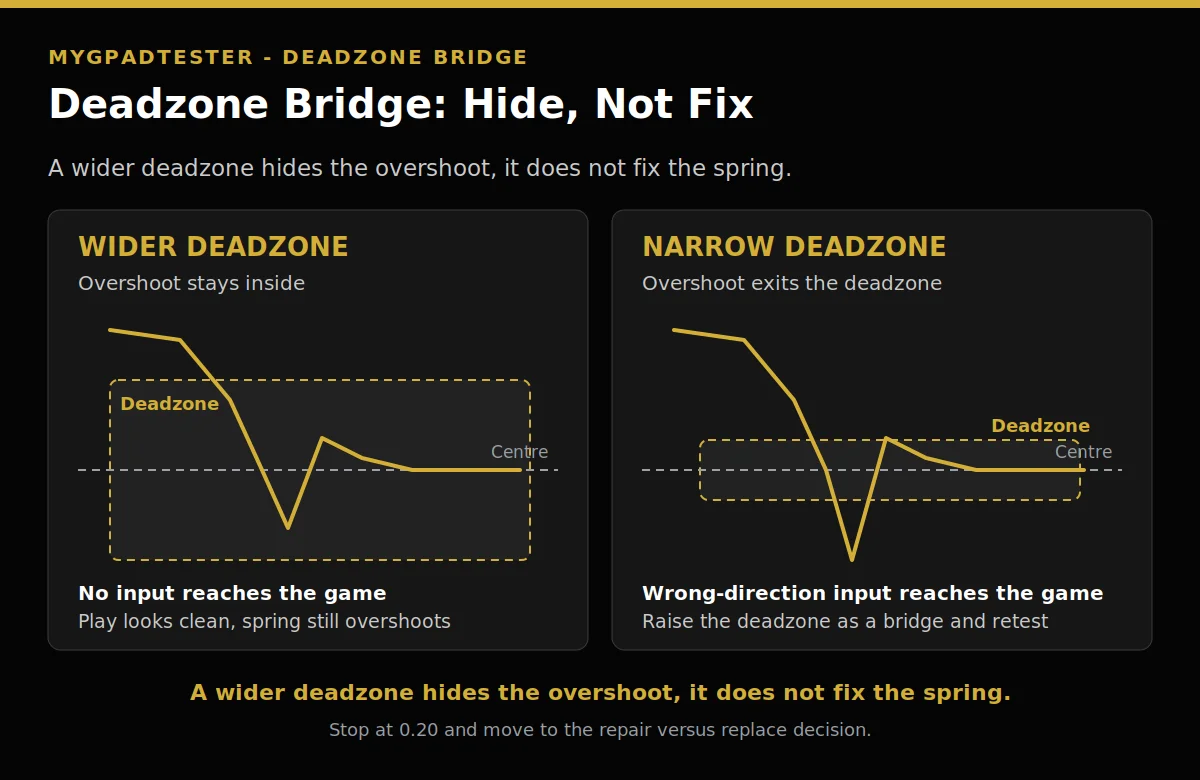
- Overshoot stays inside a wider deadzone: no input reaches the game, play looks clean, the spring still overshoots.
- Overshoot exits a narrow deadzone: a wrong-direction input reaches the game right after release, so raise the deadzone as a bridge and retest.
When snapback ruins play and what to do
Snapback ruins play only when the overshoot exits the deadzone and gives a wrong-direction input in a game. A spike that stays inside the deadzone is a reading, not a problem. Leave it alone and keep playing.
If it does break play, raise the deadzone as a bridge, then retest. Raise it in small steps, one stick at a time, and stop at 0.20. If the deadzone you need starts to eat real inputs, the bridge has run out. Replace the controller if it ruins play.
There is no hardware-mod fix in this post. Capacitor mods, firmware holds, and damping grease are GameCube-community fixes, and none of them is verified for DualSense, Xbox, or Switch Pro controllers. This post offers deadzone as a bridge, plus retest, plus replace if it ruins play. It promises no repair.
Troubleshooting in short. The spike shows on one stick only: that stick is the suspect, not the pad. The spike shows on both sticks: test each stick on its own and bridge the worse one first. The reading changes between runs: check the connection and the browser first, then retest wired before you blame the stick.
What snapback is not
Snapback is not drift. Drift stays while the stick is untouched. Snapback appears only after release and then settles. A rest reading at centre with a release spike is snapback, not drift.
Snapback is not a broken-controller verdict. OpenGCC treats it as a property of the spring return that all controllers technically experience (Tier 3). It matters only when it exits the deadzone and affects play.
Snapback is not a vendor documented fault. No vendor documents it, so no vendor fix exists for it. Hall sensing does not remove snapback either: it changes how position is read, not how the spring returns.
Limits of this test: every result here is browser observed. The test reads through the Gamepad API in Chrome or Edge, the reference browsers for testing. It names the fault from timing. It does not certify the hardware, and it does not measure the spring itself.
Related Tools
- Polling Rate Test
- Vibration Test
- Trigger Test
- Stick Drift Test (pillar, highlighted)
- Stick Deadzone Test
- Button Test
- Input Lag Test
- Gamepad Health Checker
Related Guides
- What Is Controller Stick Drift?
- How to Test Stick Drift Online
- What Is Controller Deadzone?
- Why Does My Controller Drift Without Touching It?
- How to Test a USB Gamepad Online
- Best Budget Controllers With No Stick Drift (Under $50)
About the Author
Marcus Sterling, Lead Engineer and Founder of MyGpadTester, Austin, Texas. Profile: https://mygpadtester.com/marcus-sterling/ X: https://x.com/marcussterlin
Timing names the fault. Rest names drift, release names snapback.
Frequently Asked Questions
What is controller snapback?
Snapback is the stick overshooting the centre point after release, then settling. A spring pulls the stick back to centre, and it oscillates around the centre point for a brief period (Tier 3, community firmware source). No vendor documents it.
How is snapback different from stick drift?
Drift is a steady offset that stays while the stick is untouched. Snapback is a brief spike past centre only after release, then it settles at centre.
How do I test for snapback in a browser?
Push the stick to full deflection, release it cleanly without guiding it back, and watch the return-to-centre trace. Repeat the flick three times. A spike past centre that settles is snapback (Tier 3, house test logic).
Does deadzone fix snapback?
No, it hides it. A deadzone wider than the overshoot makes the overshoot invisible to the game. It does not fix the spring.
Does snapback mean my controller is broken?
No. OpenGCC treats it as a spring return property that all controllers technically experience (Tier 3). It matters only when it exits the deadzone and affects play.
Can a Hall effect stick still snap back?
Yes. Hall sensing changes how position is read, it does not remove the spring return. The budget picks post, Best Budget Controllers With No Stick Drift (Under $50).
Next Steps
If the rest reading is steady and only the release spikes, bridge it with deadzone and keep playing. If the rest reading sits off centre, work the drift side first and retest. If the overshoot still breaks play after the bridge, replace the pad. Run the flick and release test again after any change, and compare the new trace with the old one.