What Is a Controller Health Test and What Does It Check?
Your controller feels off but you cannot tell which part is failing? The stick looks fine, the buttons answer, yet something is wrong in game. A health test answers that question part by part.
Last updated: 13 November 2026 | Category: Controller Testing Tools | Reading time: about 9 minutes | Tested with Chrome/Edge, Gamepad API
Quick Answer
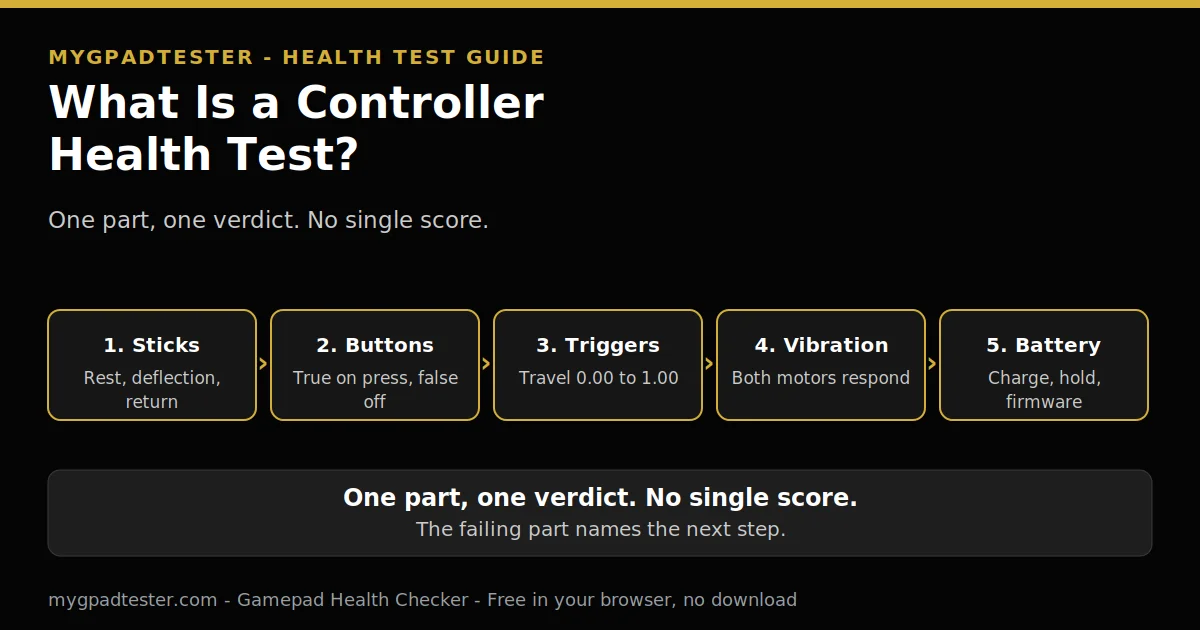
A controller health test checks each part of your pad on its own and gives a pass or fail per part: sticks, buttons, triggers, vibration, connection, battery, charging port and firmware. There is no single score out of 100, because one number cannot describe a pad. A stick can fail while the buttons pass, so the result names the failing part.
Run the health check
No download. No account. Data stays in your browser.
What a controller health test actually is
Controller health is a composite, not a single score. That is the definition this post owns. Each component gets pass or fail, for sticks, buttons, triggers, vibration, connection, and battery, charging port and firmware where relevant. No invented 0 to 100 score, no health percentage, no grade, no rating. The rule is stated here, not implied: one part, one verdict, then read the pattern.
One number cannot describe a pad. A stick can fail while the buttons pass, so a single score would hide the fault. A pad with a dead trigger and perfect sticks has one failed part, and the fix starts there.
Two house rules apply before you test anything. Press any button to wake the Gamepad API. A blank test before any press is normal. The browser cannot test what the operating system does not see. Fix the OS connection first, then retest in the browser.
This post owns the definition, what each component check means, how to read a result, and the retest rule. The tool page owns the interactive screening itself. Use the tool to run the checks, use this post to understand what each check means.
How to read the result: pass or fail per part
Read the result one part at a time. A pass means the part behaved as expected. A fail means it did not, and the table below says what that fail usually means. Count the fails and look at where they sit.
One failed part is a repair candidate, and the fix lives in its own post, linked in the table. Several failed parts across the pad point at the whole pad, and that decision belongs to its own later post. This post names that fork once and stops there.
A pass is only as good as the test run. Test flat and untouched for the sticks, one press at a time for the buttons, and the same browser and connection for every retest. Change one thing, then retest.
What each component check means
Eight checks, in the order below. Each one names what it measures and what fail looks like.
1. Sticks: rest reading, full deflection, return to center. Leave the stick alone and watch the rest reading, then push it to full deflection in each direction and let it return to center. The house drift scale applies, labelled tester convention every time, never a Sony, Microsoft or Nintendo specification: flickers within 0.02 to 0.03 is normal noise; steady offset 0.05 to 0.10 is mild; above 0.10 or creeping is clear drift. What drift is explains the fault itself. The full method is the drift test method. Fail looks like a steady offset at rest, a stick that never reaches full deflection, or one that does not return to center.
2. Buttons: pressed flips true on press and false on release. Press every button once, including stick clicks L3 and R3 and the D-pad directions. Pressed flips true on press and false on release (Tier 1, Gamepad API). A button that stays true is stuck. One that never flips is dead at the contact or not detected at the OS layer. Test every button in the button test. The six-step button test method lives in its own post.
3. Triggers: analog travel 0.00 to 1.00. Pull each trigger slowly from rest to full pull and watch the travel. Rest above 0.02 and full pull below 0.98 are tester conventions, never vendor specifications (Tier 3 typical). A trigger that never reaches full pull or rests above zero is a range fault.
4. Vibration: output on both sides. Run the vibration output check and feel for both motors. Vibration is output, trigger press is input (Tier 1, Gamepad API). Weak or dead rumble on one side only is a motor or output fault.
5. Connection: polling reading stable, no repeated dropouts. Watch the polling reading for stability. Jitter is described qualitatively only: wide, unstable, spikes and drops. A second controller that does not drop out points at the first pad, not the connection. Retest wired to isolate Bluetooth.
6. Battery: does it charge, and does it hold charge. Two real tests. First, does it charge: connect a known good data-capable cable to a known good port and watch for the charging indicator. Note whether charging starts at all. If nothing starts, change the cable first, then the port, then suspect the controller. Second, does it hold charge: charge fully, disconnect, play normally, and compare the run time against the controller’s own previous baseline, never a universal hour number. A sudden drop against its own baseline is the signal.
7. Charging port: angle dependence means wear. If charging only works when the cable is held at an angle, or works with one cable but not another, the port or cable is worn. Gentle wiggle test only, no force.
8. Firmware: update, then retest the same reading. Check for a controller or console update through the console settings or the vendor’s PC app, such as the PlayStation Accessories app on a Windows PC for a DualSense (Tier 2, PlayStation Support). Retest the SAME reading in the SAME browser on the SAME connection before and after the update. If the reading changes after the update, the firmware layer was part of the fault. If nothing changes, the fault is elsewhere.
Stop at once for a swollen battery, heat, smell, or visible damage. Do not use the controller further.
| Component | What the check means | What fail looks like |
|---|---|---|
| Sticks | Rest reading at center, full deflection reach, return to center | Steady offset at rest, never reaches full deflection, or does not return to center |
| Buttons | Pressed flips true on press and false on release, every button including L3, R3, and D-pad | Stays true means stuck, never flips means dead at the contact or not detected at the OS layer |
| Triggers | Analog travel 0.00 to 1.00, rest above 0.02 and full pull below 0.98 are tester conventions | Never reaches full pull, or rests above zero, a range fault |
| Vibration | Output check, motors respond on both sides | Weak or dead rumble on one side only, a motor or output fault |
| Connection | Polling reading stable, no repeated dropouts | Repeated dropouts, or wide unstable jitter, while a second controller stays steady |
| Battery | Charges, and holds charge against its own previous baseline | Charging never starts, or run time drops suddenly against its own baseline |
| Firmware | Update, then retest the same reading in the same browser on the same connection | Reading unchanged after the update means the fault is elsewhere, not the firmware layer |
| Charging port | Charging works without holding the cable at an angle | Only charges at an angle, or works with one cable but not another, port or cable wear |

The retest rule: one variable at a time
Test first, change one thing, then retest the same way. Same browser, same connection, same stick, same reading. If the reading changes, the change names the layer. If nothing changes, that layer is ruled out.
Firmware is where this rule matters most. Test first, record the reading, update, then retest the same reading. The change, or the lack of one, names the layer.
The same rule applies after any fix. Clean the stick, retest. Change the cable, retest. A fix you cannot measure is a guess.
How to run a controller health test
One quick pass through the checks below takes about 15 minutes. The battery hold-charge comparison is not part of that timed pass. It runs over normal play, against the controller’s own previous baseline.
1. Sticks: rest, full deflection, return to center. Leave the sticks alone, note the rest reading, push to full deflection in each direction, let them return to center, retest.
2. Buttons: one press at a time. Press every button once, including L3, R3, and the D-pad directions, and watch pressed flip true and then false, retest.
3. Triggers: slow pull, rest to full. Pull each trigger slowly from rest to full pull and watch the 0.00 to 1.00 travel, retest.
4. Vibration: both sides. Run the vibration output check and feel for both motors, retest.
5. Connection: watch the polling reading. Watch for a stable reading with no repeated dropouts, and retest wired if Bluetooth drops, retest.
6. Battery and charging port: does it charge. Connect a known good data-capable cable to a known good port, watch for the charging indicator, and note angle dependence, retest.
7. Firmware: check, update, retest the same reading. Record the reading first, check for an update, apply it, then retest the SAME reading in the SAME browser on the SAME connection, retest.

| Component | Reading in the visual | Pass or fail |
|---|---|---|
| Sticks | Rest flickers within 0.02 to 0.03, normal noise, tester convention | Pass |
| Sticks, mild case | Steady offset 0.05 to 0.10, same direction, tester convention | Fail, mild |
| Sticks, clear case | Steady offset above 0.10 or creeping, tester convention | Fail, clear |
| Buttons | Pressed flips true on press and false on release, every button | Pass |
| Triggers | Travel 0.00 to 1.00, rest above 0.02, full pull below 0.98, tester conventions | Pass |
| Vibration | Both motors respond | Pass |
| Connection | Polling reading stable, no repeated dropouts | Pass |
| Battery and firmware | Charges, holds against its own baseline, same reading after update | Pass |
Troubleshooting: when the result does not make sense
The test shows a fail, but the controller feels fine in game. Check the test run first. A tilted surface, a double press, or a low battery can each fake a fail. Test flat and untouched, one press at a time, and retest wired.
Every part fails at once. That usually means the test setup, not the pad. A blank reading across all parts points at detection, not at eight broken components. Fix the OS connection first, wake the API, then run the pass again.
The reading changes between runs with nothing changed. Record the browser, the connection, and the battery state for each run. A reading that moves on its own is unstable, not a verdict. Run it a third time, same method, and take the pattern across the runs.
A fail appears only in one game. That is a game setting or profile mimicking a hardware fault. Check the in-game deadzone setting and any custom profile, then test in a second game or in the browser test.
Limits: what a health test cannot tell you
A health test cannot tell you how long a controller will last. That is a separate future post, and this post gives no lifespan number anywhere. The signs above matter more than a year count.
A health test cannot tell you whether to repair or replace. That decision is a separate future post. This post names the fork once: one isolated fault is a repair candidate, many failed components is a replace signal.
A browser health test reads through the Gamepad API, so every result here is browser observed. Test in Chrome or Edge, use the same browser for every retest, and keep the pad awake. No step here promises a fix. A part that fails names the next test, not the final verdict.
Related Tools
- Polling Rate Test
- Vibration Test
- Trigger Test
- Stick Drift Test
- Stick Deadzone Test
- Button Test
- Input Lag Test
- Gamepad Health Checker (pillar, highlighted)
Related Guides
- What Is Controller Stick Drift?
- How to Test Stick Drift Online
- How to Test Controller Triggers Online
- How to Test Controller Vibration Online
About the Author
Marcus Sterling, Lead Engineer and Founder of MyGpadTester, Austin, Texas. Profile: https://mygpadtester.com/marcus-sterling/ X: https://x.com/marcussterlin
Health is a list of passes and fails, not a score. Test each part, read the pattern, and let the failing part name the next step.
Frequently Asked Questions
What is a controller health test?
A controller health test is a composite check. Each part gets a pass or fail: sticks, buttons, triggers, vibration, connection, battery, charging port and firmware. It is not a single score out of 100.
Why is there no health score out of 100?
One number cannot describe a pad. A stick can fail while the buttons pass, so a single score would hide the fault. This post gives a pass or fail per part instead.
How long does a health test take?
One quick pass through the checks in this post takes about 15 minutes in the HowTo below. The battery hold-charge comparison runs over normal play and sits outside that pass.
My stick drifts but everything else passes, is the controller dead?
No. One failed part is a repair candidate, not a dead pad. The drift fix posts own the next step.
The test shows a fail but my controller feels fine in game, what should I check?
Check the test run first. A tilted surface, a double press, or a low battery can each fake a fail. Test flat and untouched, one press at a time, and retest wired.
Should I update firmware before or after the test?
Test first, update, then retest the same reading in the same browser on the same connection. The change, or the lack of it, names the layer.
My controller only charges at an angle, what does that mean?
Port or cable wear. Use the gentle wiggle test only, with no force, and change the cable first. If a new cable still needs the angle, the port is worn.
Next Steps
If a part failed, open the post that owns that part: the drift test for sticks, the button test for buttons, the trigger test for triggers. If everything passed and the pad still feels wrong in one game only, check the game setting first. If several parts failed, run the full checkup again before you spend money.
How to run a controller health test
Total Time: 15 minutes
Sticks: rest, full deflection, return to center.
Leave the sticks alone, note the rest reading, push to full deflection in each direction, let them return to center, retest.
Buttons: one press at a time.
Press every button once, including L3, R3, and the D-pad directions, and watch pressed flip true and then false, retest.
Triggers: slow pull, rest to full.
Pull each trigger slowly from rest to full pull and watch the 0.00 to 1.00 travel, retest.
Vibration: both sides.
Run the vibration output check and feel for both motors, retest.
Connection: watch the polling reading.
Watch for a stable reading with no repeated dropouts, and retest wired if Bluetooth drops, retest.
Battery and charging port: does it charge.
Connect a known good data-capable cable to a known good port, watch for the charging indicator, and note angle dependence, retest.
Firmware: check, update, retest the same reading.
Record the reading first, check for an update, apply it, then retest the SAME reading in the SAME browser on the SAME connection, retest.