PS4 DualShock 4 Stick Drift Fix
Your DualShock 4 stick keeps moving on its own, even when your hands are off? The camera drifts, the character walks, and the menu scrolls by itself. Test it first, then work the DualShock 4 steps in order.
Last updated: 13 November 2026 | Category: Controller Testing Tools | Reading time: about 8 minutes | Tested with Chrome/Edge, Gamepad API
Quick Answer
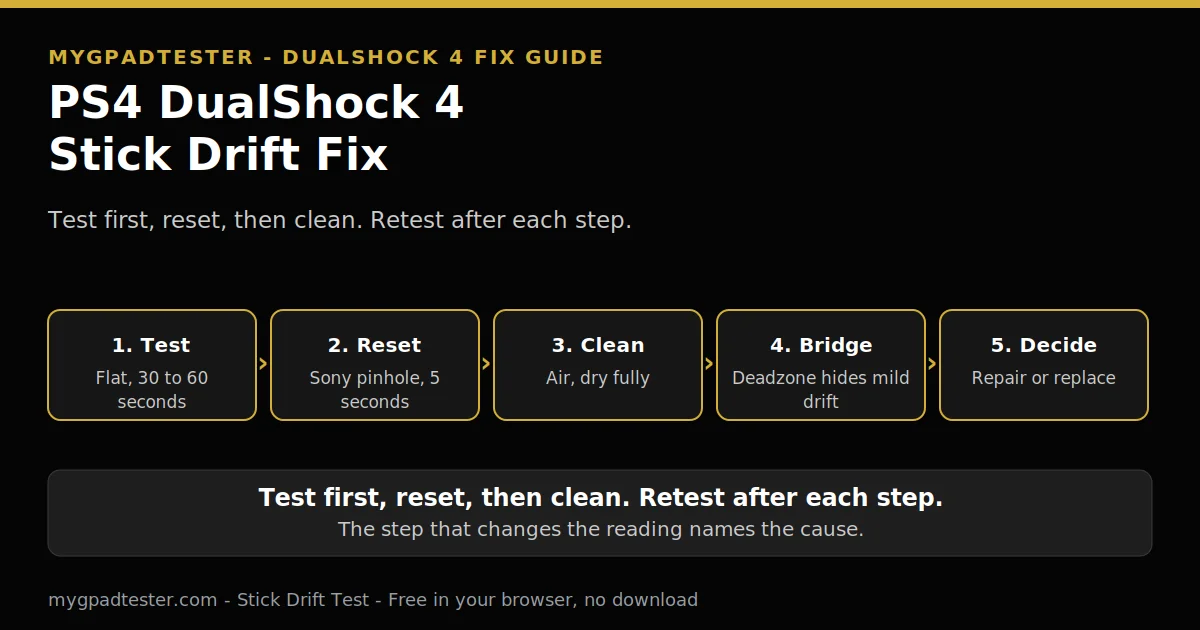
Test the stick first, then reset the DualShock 4 with the pinhole button, clean around the stick base, and bridge mild drift with a deadzone setting. Retest after each step. Sony calls the reset often the first troubleshooting step, and it sometimes helps. It never promises a fix, and cleaning cannot repair worn hardware.
What drift means on a DualShock 4
What drift is is simple: the stick reports movement while your hands are off it. That usually means wear inside the stick. The house drift scale applies, labelled tester convention every time, never a Sony specification: flickers within 0.02 to 0.03 is normal noise; steady offset 0.05 to 0.10 is mild; above 0.10 or creeping is clear drift.
Sony’s framing stays soft: the reset can sometimes resolve drift, and if not, it may indicate wear and tear needing professional repair or replacement (Tier 2, Sony manual). This post never promises the reset fixes drift.
The fix order below is the DualShock 4 order: test, Sony reset, clean, deadzone bridge, PC layer, repair versus replace. It runs parallel to the PS5 DualSense fix and the Xbox fix, but every step here is DualShock 4 specific, with no PS5-style calibration menu. Its calibration layer is the Sony reset plus a deadzone bridge.
Test first: is it really drift?
Open the stick test and leave the pad flat and untouched for 30 to 60 seconds. Record the stick, the direction, the value, the connection, and the browser. Each stick reports an X axis and a Y axis, each from minus 1.0 to 1.0 (Tier 1, Gamepad API). That record is the baseline the retest compares against. The drift test method owns the method in depth, and this post does not re-teach it.
Read the result on the house scale, tester convention every time. Flickers within 0.02 to 0.03 is normal noise, and no fix is needed. A steady offset of 0.05 to 0.10 is mild drift: clean, bridge with deadzone, retest, monitor. Above 0.10 or creeping is clear drift: clean, bridge, then the repair versus replace decision. Random jumps while untouched mean debris, a loose stick, or a failing sensor: clean carefully, retest wired, then decide.
| Reading | What it means | What to do next |
|---|---|---|
| Flickers within 0.02 to 0.03 | Normal noise | No fix needed, monitor |
| Steady offset 0.05 to 0.10 | Mild drift | Clean, deadzone bridge, retest, monitor |
| Above 0.10 or creeping | Clear drift | Clean, deadzone bridge, then repair versus replace decision |
| Random jumps, even untouched | Debris, loose stick, or failing sensor | Clean carefully, retest wired, then decide |
This scale is a tester convention, not a Sony specification. Some other testers use above 0.15 as their replace threshold. This site uses the scale above for consistency. Never use 0.15 as the house threshold.
If the whole controller is blank in the test, stop here. Fix detection first, drift fix second. Fix detection first in the generic not-detected guide. A pad the browser cannot see cannot be drift tested.
Why a DualShock 4 stick drifts
A DualShock 4 stick reads position with a potentiometer. A potentiometer is a variable resistor that forms a variable voltage divider. Moving the stick moves a conductive wiper against a resistive contact pad, which varies the resistance and therefore the output voltage. The controller reads that voltage as a position. Two potentiometers per stick, one for X and one for Y (Tier 2, iFixit).
The resistive contact pads wear down from friction. Every stick movement removes a minuscule amount of material. Once the resistance value of the neutral position changes, the controller reads a different voltage than expected while stationary and interprets it as input. That is drift (Tier 2, iFixit). All three major console manufacturers use potentiometer-based joysticks, including the DualShock 4 (Tier 2, iFixit teardown). Potentiometer wear is explained in depth in the Hall versus potentiometer post.
Hall effect sticks are not drift-proof either, and this post does not claim otherwise. Even Hall effect sticks can develop drift from other causes, and a weak centering spring is one typical cause reported by the community (Tier 3 only). Your DualShock 4 has potentiometers, so wear is the usual cause, but the test still comes first. A dirty stick can look exactly like a worn one until it is cleaned.
The DualShock 4 fix order: test, reset, clean, bridge, retest
Six layers, in order. Allow about 20 minutes, including drying time after cleaning. Work them in order, one variable at a time, retest after each one. A fix you cannot measure is a guess.
1. Test first. Done in the section above. Flat and untouched, 30 to 60 seconds, record stick, direction, value, connection, browser. This is the baseline. Retest.
2. Sony reset: the pinhole procedure. Sony documents this reset, and Sony calls the reset often the first troubleshooting step (PlayStation Support, Tier 2). Work the steps exactly as Sony lists them. Turn off and unplug your PS4 console. Disconnect the controller from the official USB cable. On the back of the controller there is a tiny hole, near the L2 shoulder button, and the reset button is inside this hole. Use a small unfolded paper clip or similar to press and hold the reset button for at least five seconds. Connect the controller to the PS4 console with the official USB cable, to a USB port on the front or rear of the console. Press the PS button to pair the controller again. Retest after the reset with the same method. One variable at a time. Retest.
3. Clean: power off, warranty check first. Power the controller off. Check the warranty before any opening step. Sony’s PS4 warranty is commonly described as one year from purchase (Tier 3 softened). While covered, contact Sony support for repair options before opening anything. Then use compressed air around the stick base and a small amount of contact cleaner only if safe for the use. Dry fully before retesting. No flooding, no WD-40 or household cleaners. Stop for a swollen battery, heat, smell, or damage. Never open the controller in this guide. Retest.
4. Deadzone bridge: hide mild drift, not a fix. Sony documents the reset above, not a PS5-style calibration menu. The calibration layer for this post is the reset plus a deadzone bridge: an in-game deadzone setting or a Steam Input deadzone. A deadzone bridge hides mild drift, it does not repair it. Start with resting plus 0.01 as a starting guide, and outer 0.95 to 0.98 as a starting guide. Stop raising the deadzone at 0.20 and move to the repair versus replace decision. The 0.20 stop rule is a tester guide, never a vendor specification. Set the deadzone per stick separately. Retest.
5. PC layer: name the active layer. On PC, name the layer before you change it. Steam’s PlayStation Configuration Support or DS4Windows (Tier 3 typical). Change one layer, retest, record. Close other remappers before retesting, because a second remapper in the path can grab the pad and hide the change. DS4Windows has changed builds over time, so use a current build from its project page and do not download it from a random mirror. If drift appears on PC but not on PS4, the PC layer is the first suspect, not the stick. Retest.
6. Repair versus replace: reset plus clean plus retest unchanged means wear. If the reset, the clean, and the retest leave the reading unchanged, the fault is wear or a sensor fault. Check the warranty, contact Sony support for repair options while covered, and use iFixit as the repair route authority. This post gives no opening instructions. Run the full health check to see every component in one place before you decide. Retest.


Troubleshooting: reset and clean did not help
The reset changed nothing and the clean changed nothing. That is useful information, not a failure. Reset plus clean plus retest unchanged means wear or a sensor fault. Go to layer 6, check the warranty, and contact Sony support for repair options while covered. Do not keep cleaning a worn stick. Cleaning helps debris, not worn hardware.
Drift appears on PC but not on PS4. Name the active PC layer first. Test with Steam Input off, then on, and note which state the tester sees. Close DS4Windows and other remappers before retesting. If the drift follows the PC layer and never appears on the console, the layer is the fault, not the stick.
Drift appears in one game only. Check the in-game deadzone setting and any custom profile before touching the controller. A game setting can mimic drift in one game and nowhere else. Test in a second game or in the browser test.
The stick click stopped working but the stick moves fine. That is a button fault, not drift. Stick clicks are buttons, so test them in the button test. Do not treat a dead click as drift and do not clean the stick for it.
The stick still jumps randomly after cleaning. Random jumps while untouched mean debris, a loose stick, or a failing sensor. Retest wired as the control run. If the jumps survive the clean and the wired retest, the sensor or the stick assembly is the suspect, and the repair versus replace decision is next.
Limits: what this fix cannot do
This fix cannot repair worn hardware. Cleaning removes debris. A deadzone bridge hides mild drift. Neither one restores a worn resistive contact pad. A reading that stays above 0.10 after reset, clean, and bridge is wear, and the honest next step is repair or replacement, not another round of cleaning.
This fix does not cover Joy-Con drift. Joy-Con is a distinct platform entity with its own drift story. Name it here once only: if your Joy-Con drifts, its fix lives in its own post, not this one.
This fix does not cover a controller the browser cannot see. Detection comes first, drift second, and the detection guide is linked in the test-first section. A browser test reads through the Gamepad API, so every result here is browser observed. Test in Chrome or Edge, use the same browser for every retest you compare, and keep the pad awake during each run. Sony’s own caveat is that there is no guarantee that all devices are compatible with the controller (Tier 2, PlayStation Support).
Related Tools
- Polling Rate Test
- Vibration Test
- Trigger Test
- Stick Drift Test (pillar, highlighted)
- Stick Deadzone Test
- Button Test
- Input Lag Test
- Gamepad Health Checker
Related Guides
- What Is Controller Stick Drift?
- How to Test Stick Drift Online
- PS5 DualSense Stick Drift Fix
- Xbox Series Stick Drift Fix
- Hall Effect vs Potentiometer Joystick
About the Author
Marcus Sterling, Lead Engineer and Founder of MyGpadTester, Austin, Texas. Profile: https://mygpadtester.com/marcus-sterling/ X: https://x.com/marcussterlin
Test first, reset, clean, bridge, retest. The step that changes the reading names the cause.
Frequently Asked Questions
Does resetting a DualShock 4 fix stick drift?
It can sometimes resolve drift, and it may indicate wear and tear requiring professional repair or replacement if it does not (Tier 2, Sony manual). Sony calls the reset often the first troubleshooting step. Never treat it as a promised fix.
Where is the reset button on a DualShock 4?
On the back of the controller there is a tiny hole, near the L2 shoulder button, and the reset button is inside this hole (Tier 2, PlayStation Support). Press and hold it for at least five seconds with a small unfolded paper clip.
Why does my DualShock 4 drift on PC but not on PS4?
Check the PC layer first. Name the active layer, Steam Input or DS4Windows, change one layer, retest, and record. Close other remappers before retesting.
My DualShock 4 drifts in one game only, is that drift?
Probably not drift. Check the in-game deadzone setting and any custom profile before touching the controller. A game setting can mimic drift in one game and nowhere else. Test in a second game or in the browser test.
Can I calibrate a DualShock 4 stick on PS4?
Sony documents the reset, not a PS5-style calibration menu. The bridge is an in-game or Steam Input deadzone setting, which hides mild drift, not a fix.
Cleaning did not help, what now?
Reset plus clean plus retest unchanged means wear or a sensor fault. Check the warranty, contact Sony support for repair options while covered, and use iFixit as the repair route authority. This post gives no opening instructions.
My stick click stopped working but the stick moves fine, is that drift?
No, that is a button fault, not drift. Stick clicks are buttons, so test them in the button test.
Next Steps
If the reading improved after one layer, stop there and monitor it. If it is unchanged after reset and clean, work the deadzone bridge, then the PC layer, then the repair versus replace decision. If the whole controller is blank in the test, fix detection first and come back to this guide after. Do not keep cleaning a worn stick.
How to fix PS4 DualShock 4 stick drift
Total Time: 20 minutes
Test first.
Done in the section above. Flat and untouched, 30 to 60 seconds, record stick, direction, value, connection, browser. This is the baseline. Retest.
Sony reset: the pinhole procedure.
Sony documents this reset, and Sony calls the reset often the first troubleshooting step (PlayStation Support, Tier 2). Work the steps exactly as Sony lists them. Turn off and unplug your PS4 console. Disconnect the controller from the official USB cable. On the back of the controller there is a tiny hole, near the L2 shoulder button, and the reset button is inside this hole. Use a small unfolded paper clip or similar to press and hold the reset button for at least five seconds. Connect the controller to the PS4 console with the official USB cable, to a USB port on the front or rear of the console. Press the PS button to pair the controller again. Retest after the reset with the same method. One variable at a time. Retest.
Clean: power off, warranty check first.
Power the controller off. Check the warranty before any opening step. Sony’s PS4 warranty is commonly described as one year from purchase (Tier 3 softened). While covered, contact Sony support for repair options before opening anything. Then use compressed air around the stick base and a small amount of contact cleaner only if safe for the use. Dry fully before retesting. No flooding, no WD-40 or household cleaners. Stop for a swollen battery, heat, smell, or damage. Never open the controller in this guide. Retest.
Deadzone bridge: hide mild drift, not a fix.
Sony documents the reset above, not a PS5-style calibration menu. The calibration layer for this post is the reset plus a deadzone bridge: an in-game deadzone setting or a Steam Input deadzone. A deadzone bridge hides mild drift, it does not repair it. Start with resting plus 0.01 as a starting guide, and outer 0.95 to 0.98 as a starting guide. Stop raising the deadzone at 0.20 and move to the repair versus replace decision. The 0.20 stop rule is a tester guide, never a vendor specification. Set the deadzone per stick separately. Retest.
PC layer: name the active layer.
On PC, name the layer before you change it. Steam’s PlayStation Configuration Support or DS4Windows (Tier 3 typical). Change one layer, retest, record. Close other remappers before retesting, because a second remapper in the path can grab the pad and hide the change. DS4Windows has changed builds over time, so use a current build from its project page and do not download it from a random mirror. If drift appears on PC but not on PS4, the PC layer is the first suspect, not the stick. Retest.
Repair versus replace: reset plus clean plus retest unchanged means wear.
If the reset, the clean, and the retest leave the reading unchanged, the fault is wear or a sensor fault. Check the warranty, contact Sony support for repair options while covered, and use iFixit as the repair route authority. This post gives no opening instructions. Run the full health check to see every component in one place before you decide. Retest.