
You plugged the pad in with USB, opened the tester, and now you want proof it all works?
Last updated: 14 November 2026 | Category: Controller Testing Tools | Reading time: about 10 minutes | Tested with Chrome/Edge, Gamepad API
Quick Answer
Plug the pad in with a data cable, open the tester in Chrome or Edge, and press a button to wake the Gamepad API. Then test in order: buttons, stick, trigger, polling, lag, and health. Read each result against its scale below. A wired run gives the clean baseline, so retest wired before you blame the pad.
Open the Button Test
No download. No account. Data stays in your browser.
Before you start: wake, browser, cable
A USB test is a wired baseline. The pad, the cable, the port, and the browser must be right before any reading counts.
Press any button to wake the Gamepad API. A blank test before any press is normal. The browser cannot test what the operating system does not see. Fix the OS connection first, then retest in the browser. If the pad does not appear at all, that guide owns the fault tree, and this post moves on.
The browser reads the pad through the Gamepad API. Axes run from -1.0 to 1.0. Buttons run from 0.0 to 1.0, where 0.0 means fully unpressed and 1.0 means fully pressed (Tier 1, W3C Gamepad API). The spec also defines a centre position value for an axis designed to return to centre (Tier 1, W3C). That centre value is the basis for the rest reading in the stick test.
Use Chrome or Edge for the test. Chrome and Edge are reference browsers for testing. Firefox has basic support. Safari and mobile have limited support. Use the same browser for every retest you compare.
In Firefox, gamepads are only exposed to a page when you interact with one while the page is visible, which helps prevent fingerprinting (Tier 2, MDN, MDN Gamepad API guide). Press a button first, then read.
The setup steps below are house test logic, Tier 3, not a vendor instruction. Use a data-capable cable, not a charge-only cable. Plug into a direct USB port on the computer, not a hub. Close Steam Input and DS4Windows before retesting, because they can remap or hide the raw input.
Then run the test order: buttons, stick, trigger, polling, lag, health. What drift is matters in the stick step.
The test order in full
Allow about 15 minutes for the full run. Work the steps in order and record each reading as you go: stick, direction, value, connection, browser. That record is what the retest compares against.
| Step | Tool | What to read | What a pass looks like |
|---|---|---|---|
| 1 | Button Test | Each button, pressed once slowly in order | Every button flips and returns, none sticks |
| 2 | Stick Drift Test | Rest reading, then a full deflection sweep | Rest within 0.02 to 0.03, or a steady offset read against the house scale |
| 3 | Trigger Test | Trigger axis, rest and full pull | Rest 0.02 or below, full pull 0.98 or above |
| 4 | Polling Rate Test | Your own result, read with the Tier 1 interval maths | A stable reading you can compare across runs, not a promised Hz figure |
| 5 | Input Lag Test | Browser estimate bands only | Under 8 ms excellent, 8 to 16 ms normal, over 16 ms investigate |
| 6 | Gamepad Health Checker | Per-component pass or fail | Each component passes on its own, sticks, buttons, triggers, vibration, connection |
This order is house procedure, Tier 3, not a vendor procedure. Each step gives its own verdict, and no single number decides the pad.
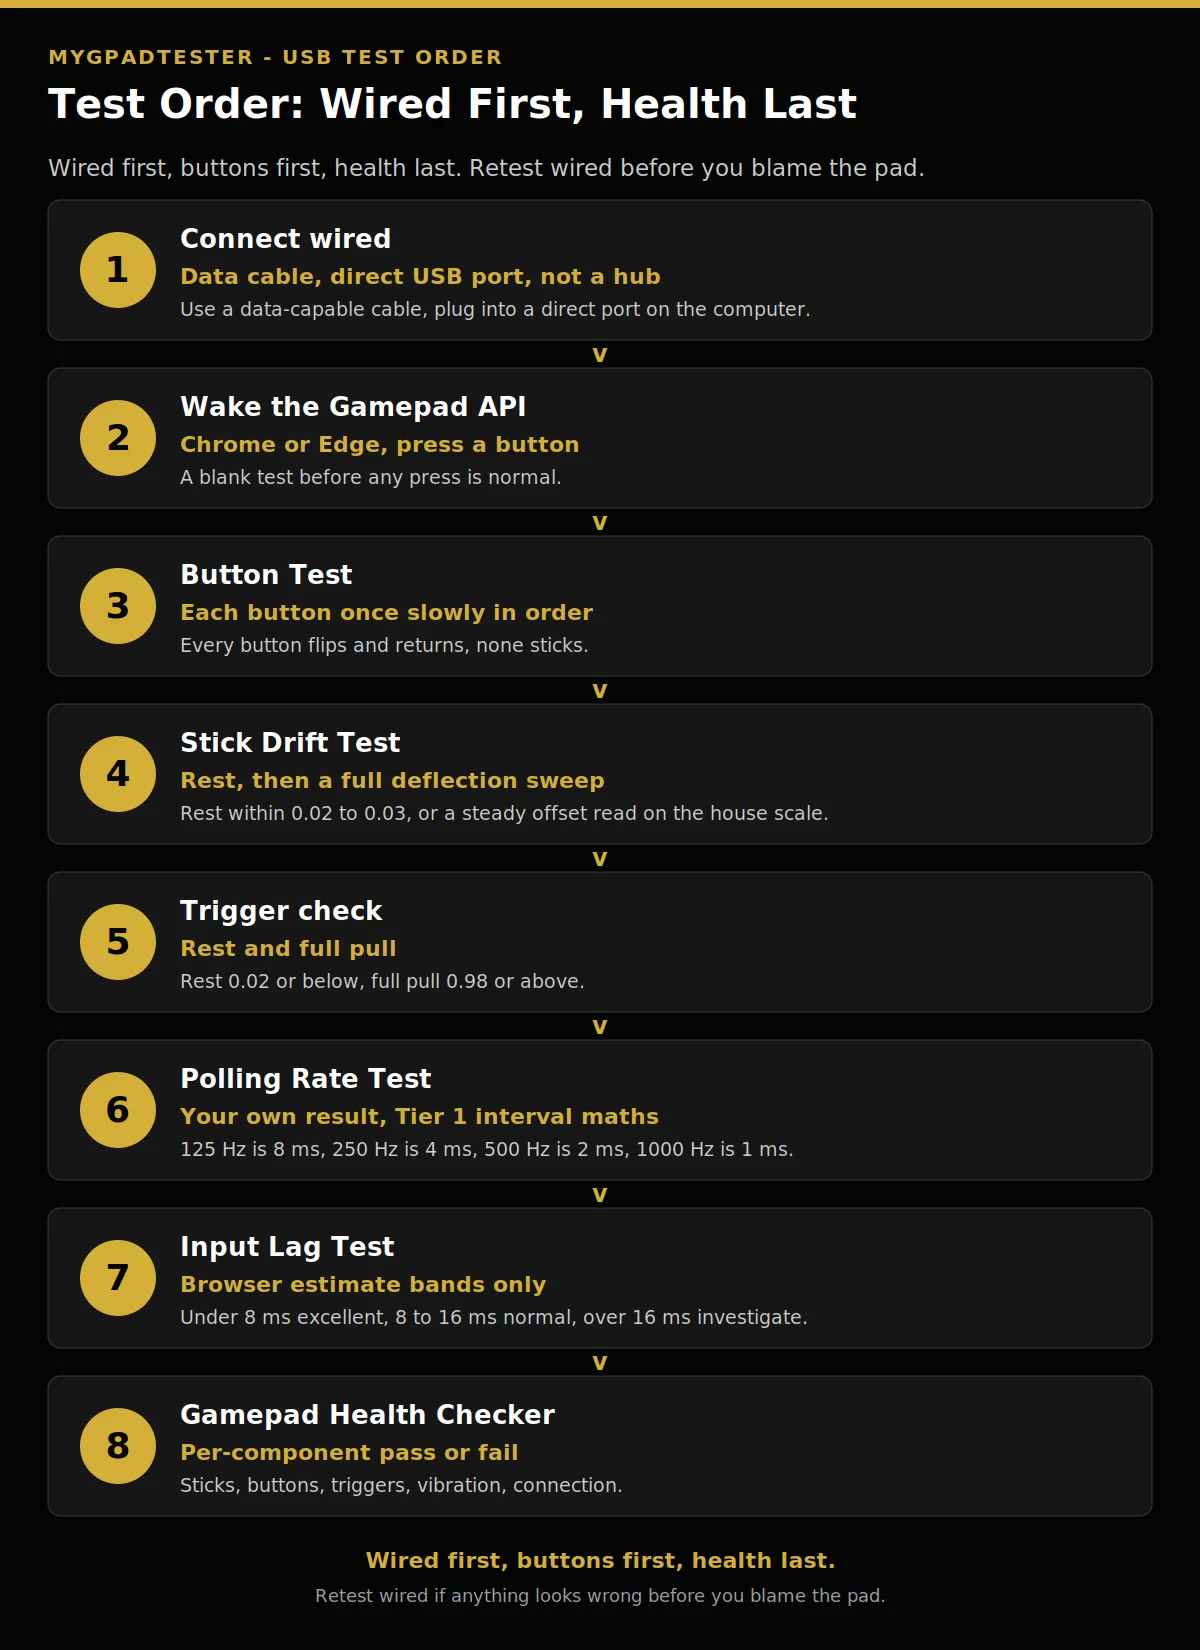
- Connect wired with a data-capable cable, direct USB port, not a hub.
- Open the tester in Chrome or Edge, press a button to wake the Gamepad API.
- Run the Button Test first, each button once slowly in order.
- Run the Stick Drift Test at rest, then a full deflection sweep.
- Check the triggers, rest and full pull.
- Run the Polling Rate Test, then the Input Lag Test.
- Run the Gamepad Health Checker last for a per-component pass or fail.
- Retest wired if anything looks wrong before you blame the pad.
How to test a USB gamepad online
Total Time: 15 minutes
Connect wired with a data-capable cable into a direct USB port, not a hub.
Connect wired with a data-capable cable into a direct USB port, not a hub.
Open the tester in Chrome or Edge and press a button to wake the Gamepad API.
Open the tester in Chrome or Edge and press a button to wake the Gamepad API.
Run the Button Test, each button once slowly in order.
Run the Button Test, each button once slowly in order.
Run the Stick Drift Test at rest for 30 to 60 seconds, then a full deflection sweep.
Run the Stick Drift Test at rest for 30 to 60 seconds, then a full deflection sweep.
Check the triggers, rest and full pull on the 0.00 to 1.00 axis.
Check the triggers, rest and full pull on the 0.00 to 1.00 axis.
Run the Polling Rate Test and read your own result with the Tier 1 interval maths.
Run the Polling Rate Test and read your own result with the Tier 1 interval maths.
Run the Input Lag Test and read the browser estimate bands only.
Run the Input Lag Test and read the browser estimate bands only.
Run the Gamepad Health Checker last for a per-component pass or fail.
Run the Gamepad Health Checker last for a per-component pass or fail.
Button test first
Press each button once slowly in order. Watch each press flip and return. A button that flips cleanly and comes back is a pass. A button that sticks, fires twice, or never fires needs a closer look.
The button test method owns per-button diagnosis, and this post does not repeat it. Stuck buttons, double input, and dead buttons each have their own cause, so use that post to name the fault once this step flags it.
Press the face buttons, the shoulders, the D-pad in each direction, and the stick clicks L3 and R3. Go slowly. A fast mash hides a sticky button, because the next press can mask the one that did not return.
If a button fails here, note which button it is and finish the run. A single bad button does not cancel the stick, trigger, polling, and lag readings. Fix the button fault with its own guide after.
Stick and trigger readings
Open the Stick Drift Test and put the pad flat and untouched for 30 to 60 seconds. Read the rest result on the house drift scale, labelled tester convention every time, never a vendor specification. Flickers within 0.02 to 0.03 is normal noise. A steady offset of 0.05 to 0.10 is mild. Above 0.10 or creeping is clear drift. Random jumps while untouched mean debris, a loose stick, or a failing sensor.
The drift test method owns the full drift test, and this post uses the scale only to read the rest result. Test each stick separately, left and right, and note the direction and the value for each one. A reading on one stick says nothing about the other stick.
Then run a full deflection sweep. Push each stick to full deflection in each direction and let it return. Watch the trace through the sweep, not just the rest number. A stick that tracks smoothly and settles at centre is a pass. A stick that jumps, sticks, or settles off centre needs the drift guide next.
If the stick spikes past centre into the opposite direction only on release, that reading belongs to the snapback post, Snapback vs Stick Drift. Do not call a release spike drift. Drift is a steady offset that stays while the stick is untouched.
If the rest reading is mild drift, a deadzone can bridge it while you decide the next step. Check the deadzone and set it per stick separately. A deadzone hides drift, it does not repair drift. Start with resting plus 0.01 as a starting guide, never a vendor specification. Stop at 0.20 and move to repair versus replace.
Now the triggers. Open the Trigger Test. The trigger axis runs 0.00 to 1.00, Tier 3 tester convention, never a vendor specification. Rest above 0.02 needs a check. Full pull below 0.98 needs a check. Pull each trigger slowly to full, hold it, then release it cleanly. A trigger that rests at 0.00 and reaches full pull is a pass.
The trigger test method owns the trigger test in depth. Use it if either trigger fails here. A trigger press is input, and vibration is output, so do not read a weak rumble as a trigger fault.
Polling and lag readings
The Polling Rate Test reads your own result. Compare it with the Tier 1 interval maths: 1000 divided by Hz. 125 Hz is 8 ms, 250 Hz is 4 ms, 500 Hz is 2 ms, 1000 Hz is 1 ms. These are nominal report intervals, not a guaranteed delay. Say report interval, not wait, for maths-only numbers.
A browser result is browser observed, via Gamepad API, gated by frame rate. It is for comparison and stability, not for certifying hardware Hz. Never promise 1000 Hz in a browser on a 60 Hz display. Run the test twice in the same browser and compare the two runs.
Xbox Bluetooth is about 125 Hz, lower and more variable, Tier 3 typical, browser observed. A wired USB test is the clean baseline. Retest wired before concluding the pad is at fault. If a reading looks wrong over Bluetooth, plug in with USB and run it again.
The Input Lag Test reads browser estimate bands only, never end to end lag. Under 8 ms is excellent, 8 to 16 ms is normal, over 16 ms is investigate, as a browser estimate guide, Tier 3 house wording. Frame interval maths, Tier 1: 60 Hz is 16.7 ms, 120 Hz is 8.3 ms, 144 Hz is 6.9 ms, 240 Hz is 4.2 ms.
Read the lag result as a browser estimate, not as the whole chain from press to screen. If the band says investigate, change one variable and retest: wired instead of Bluetooth, a direct port instead of a hub, Steam Input and DS4Windows closed. The same reading in the same browser on the same connection, before and after each change, one variable at a time, is the retest rule.
Describe jitter qualitatively only: wide, unstable, spikes and drops. If the polling trace jumps around, note that it is unstable and retest wired.
Five terms, not one number. Polling rate: how often a controller reports input, in Hz. Report interval: the nominal time between reports, 1000 divided by Hz, not a guaranteed delay. Input latency: the total delay from input to game or screen response, which this browser test does not measure end to end. Jitter: variation in measured intervals or update timing. Browser measurement: the timing the browser sees in Gamepad API data, not a physical press to photon measurement.
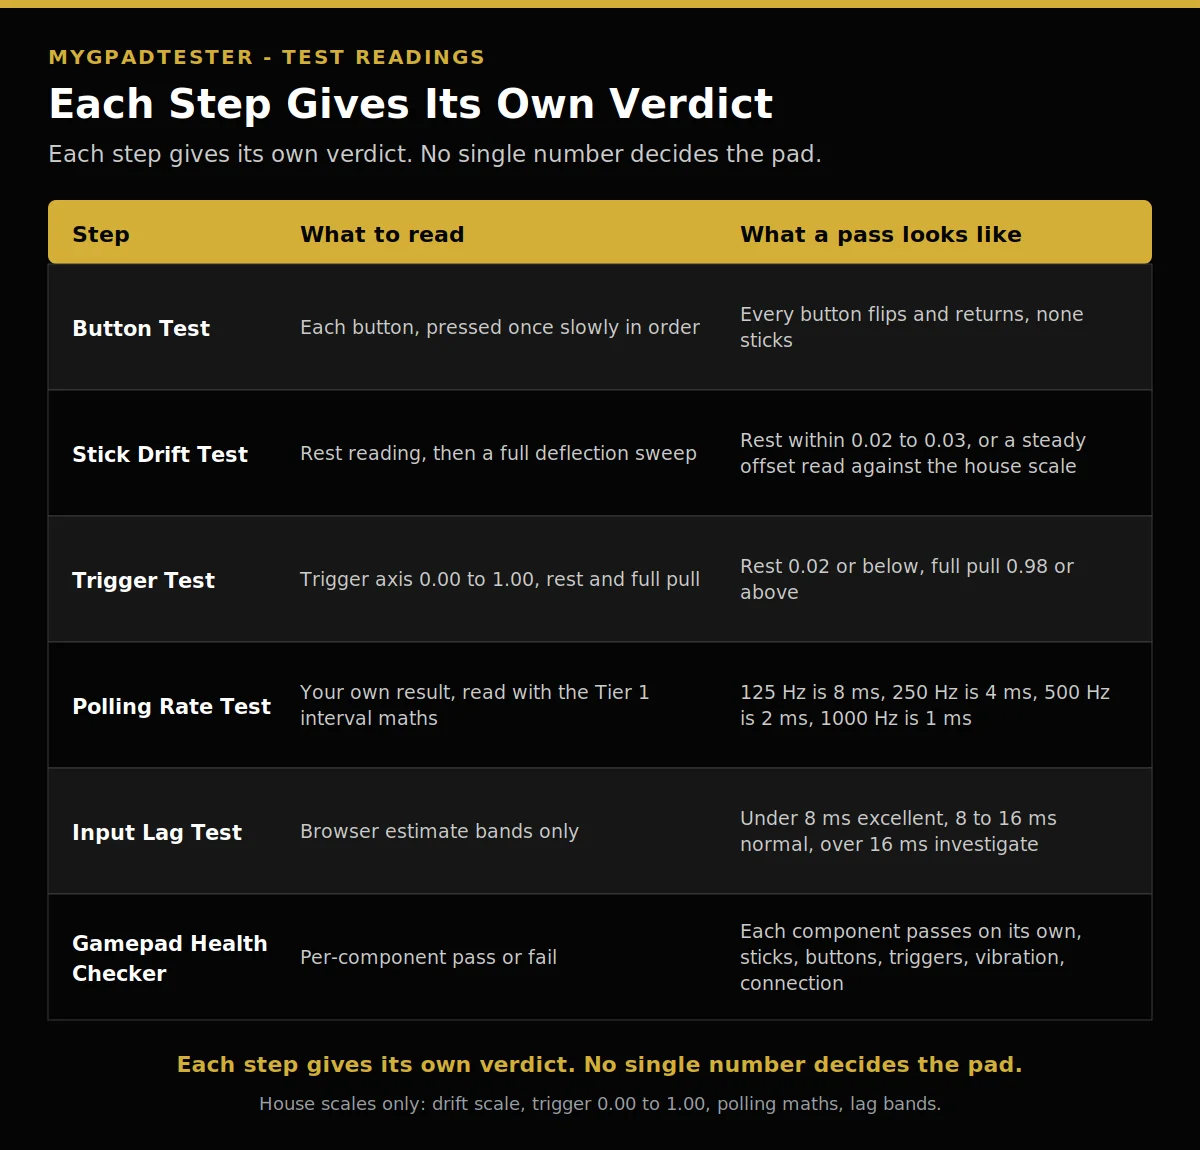
Note: the test-order table above is the text version of this visual.
Health check last
Run the Gamepad Health Checker last. Health is a composite, not a single score. Read it as per-component pass or fail for sticks, buttons, triggers, vibration and connection. There is no invented 0 to 100 health score here, no health percentage, no grade, and no rating.
A health check that passes every component is a clean pad on this run. A health check that fails one component names that component, not the whole pad. Fix the failing component first, then retest the full order.
Record the full run before you close the tab: stick, direction, value, connection, browser. Write down which steps passed and which steps failed, in the order you ran them. That record is the baseline for any fix you try next.
When a reading points elsewhere
If the pad does not appear at all, stop here. The not-detected post owns that fault tree. Fix the OS connection first, then retest in the browser.
If a button fails, use the button post linked in the button step. It owns stuck, double, and dead button diagnosis. Do not keep pressing a dead button and hoping the next press counts.
If a stick fails the rest reading, use the drift guide linked in the stick step. For mild drift, clean, calibrate, bridge with deadzone, retest, monitor. For clear drift, clean, calibrate, then the repair versus replace decision. Random jumps mean debris, a loose stick, or a failing sensor. Clean carefully, retest wired, then decide.
If a trigger fails the rest or full pull check, use the trigger post linked in the trigger step. It owns the full trigger method. Do not read a trigger fault as a stick fault, and do not read a weak rumble as a trigger fault.
If polling or lag looks wrong, retest wired first. A Bluetooth reading that clears up on USB names the connection, not the pad. A reading that stays wrong on USB, in the same browser, after Steam Input and DS4Windows are closed, names the pad or the port. Try a direct port before you blame the pad.
If the pad fails and you need a replacement. Its title is Best Budget Controllers With No Stick Drift. No pick is made here. Test the pad you already own first.
What this test cannot tell you: it cannot certify a hardware Hz figure. It cannot measure end to end lag. It cannot see a pad the operating system does not see. It reads what the browser sees through the Gamepad API, in Chrome or Edge, on a wired baseline.
Related Tools
- Polling Rate Test
- Vibration Test
- Trigger Test
- Stick Drift Test
- Stick Deadzone Test
- Button Test (pillar, highlighted)
- Input Lag Test
- Gamepad Health Checker
Related Guides
- What Is Controller Stick Drift?
- How to Test Stick Drift Online
- How to Test All Controller Buttons Online
- How to Test Controller Triggers Online
- Gamepad Not Detected by Browser
- Snapback vs Stick Drift, the release reading guide.
- Best Budget Controllers With No Stick Drift, the budget picks post.
About the Author
Marcus Sterling, Lead Engineer and Founder of MyGpadTester, Austin, Texas. Profile: https://mygpadtester.com/marcus-sterling/ X: https://x.com/marcussterlin
Wired first, buttons first, health last. Retest wired before you blame the pad.
Frequently Asked Questions
How do I test a USB gamepad online?
Connect wired with a data cable, open the tester in Chrome or Edge, and press a button to wake the Gamepad API. Then run the test order: buttons, stick, trigger, polling, lag, health.
Why is the tester blank until I press a button?
A blank tester before any press is normal. Press a button first, then read. In Firefox, gamepads are only exposed to a page when you interact with one while the page is visible (Tier 2, MDN).
My USB gamepad does not appear at all, what now?
Fix the OS connection first, then retest in the browser. The browser cannot test what the operating system does not see. The not-detected post linked above owns the full fault tree.
What order should I test a controller in?
Buttons first, then stick, then trigger, then polling, then lag, then health. This order is house procedure, Tier 3, not a vendor procedure.
Can a browser test promise 1000 Hz?
No. A browser result is browser observed, gated by frame rate, for comparison and stability, not for certifying hardware Hz. Never promise 1000 Hz in a browser on a 60 Hz display.
What does the health check score mean?
It is not a score. Health is per-component pass or fail for sticks, buttons, triggers, vibration and connection. There is no invented 0 to 100 score, no percentage, no grade, and no rating.
My stick spikes past centre on release, is that drift?
No. That reading belongs to the snapback post, Snapback vs Stick Drift. Drift is a steady offset that stays while the stick is untouched.
Next Steps
If every step passes, the pad is clean on this run. Keep the record and retest the same way if a fault shows up later. If one step fails, work that step’s own guide next, fix one thing, then retest the full order in the same browser on the same connection. If the pad never appears at all, fix detection first and come back after.