Xbox Controller 125Hz Explained
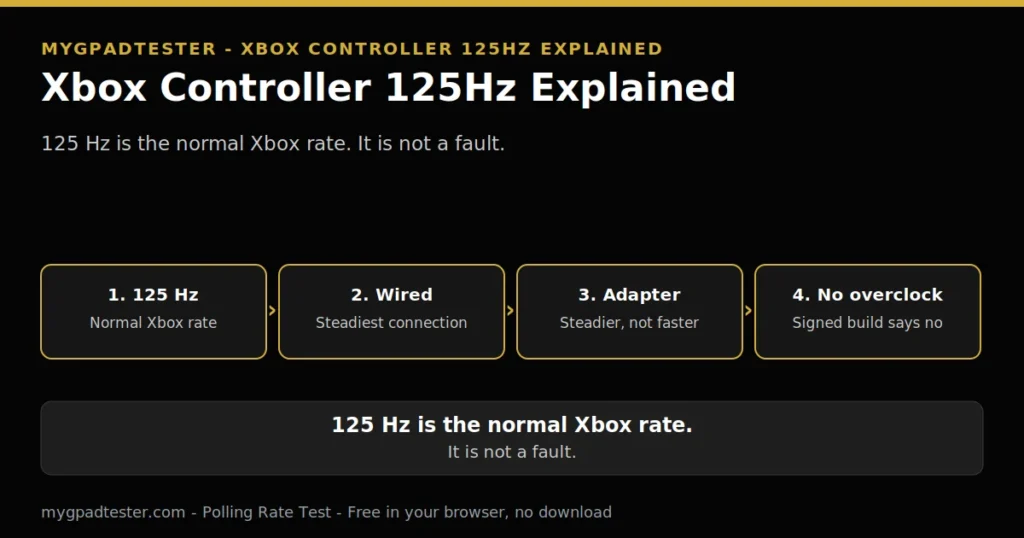
Xbox Controller 125Hz Explained You run the polling test, and the number comes back 125 Hz. Your friend’s DualSense shows 250 Hz. Is your Xbox controller broken? Is it slow? Do you need a new cable, a new adapter, or a new controller? The short answer is no. 125 Hz is the normal rate for your controller, and nothing you buy will change it. Last updated: 17 November 2026 | Category: Controller Testing Tools | Reading time: about 15 minutes | Tested with Chrome/Edge, Gamepad API Quick Answer Your Xbox controller polls at 125 Hz by design, wired or Bluetooth, and that is normal, not a fault. The rate comes from the controller firmware, not from your cable, your USB port, or your settings. The Wireless Adapter is steadier than Bluetooth but does not raise the rate, and no reliable software overclock exists for Xbox. Test your polling rateNo download. No account. Data stays in your browser. The polling test reads what the browser observes, through the Gamepad API, in Chrome or Edge. This post explains why that reading sits at 125 Hz, what the Wireless Adapter changes, and why no overclock fixes it. What 125Hz means for your Xbox controller 125 Hz means the controller sends a report 125 times a second, so a report arrives every 8 ms. That 8 ms is the report interval, the gap between reports. It is not input latency, which adds frame time and display processing. Jitter is how much the timing varies, and the browser measurement is an observation, not a hardware certificate. Polling rate is how often the controller reports. Report interval is the time between one report and the next. Input latency is the full chain from your press to the screen, and polling is only one link in it. Jitter is the variation in report timing. A browser measurement is what the browser observes, gated by frame rate, and it is for comparison and stability, not for certifying hardware Hz, Tier 1 concept. The maths is simple, Tier 1: 1000 divided by Hz. 125 Hz is 8 ms, 250 Hz is 4 ms, 500 Hz is 2 ms, 1000 Hz is 1 ms. Those numbers are report intervals, not latency. Your Xbox controller sits at the first step of that ladder, and the rest of this post explains why it stays there. Polling rate Report interval 125 Hz 8 ms 250 Hz 4 ms 500 Hz 2 ms 1000 Hz 1 ms Is 125Hz a fault, or is that normal? 125 Hz is normal for every first-party Xbox controller, and it is not a fault. The rate is set in the controller firmware, and every Xbox Series X/S, Xbox One, and Elite controller uses it in normal use, Tier 3 typical. A test that shows 125 Hz is showing a healthy controller, not a broken one. The polling test tool says the same thing in plain words: 250 Hz DualSense wired and 125 Hz Xbox wired are normal, not faults, Tier 3, own live tool page. A fault looks different. A fault is a reading that jumps, drops out, or stops. A steady 125 Hz reading is the controller working as designed. A steady stick offset is a different question from the rate. The house drift scale is short. Flickers within 0.02 to 0.03 are normal noise. A steady offset of 0.05 to 0.10 is mild drift. A steady offset above 0.10 is clear drift. Tester convention, never a vendor specification. Rate and drift are separate readings, and a normal rate does not prove a clean stick. Why wired is still 125Hz: the USB interval the controller asks for Wired is still 125 Hz because the controller firmware declares that interval, and Windows honours it. A USB device declares its polling interval in its firmware endpoint descriptor, called bInterval. Full-speed USB frames are 1 ms, so bInterval 8 means 8 ms, which is 125 Hz, and drivers cannot change the declared interval. Think of bInterval as a request the controller makes when it connects. The controller says how often it wants to be asked, and the host follows that request. Xbox controllers ask for 8 ms. A different controller can ask for 1 ms, which is 1000 Hz. The difference sits in the firmware, not in the cable and not in the port, Tier 1 concept, Tier 2 vendor concept. That is why no cable changes the rate. The cable is transport. It carries the reports the firmware already scheduled. A better cable cannot make the controller ask for a shorter interval, and a cheap cable cannot make it ask for a longer one. The interval is declared in firmware, and the host honours it. Xbox versus DualSense: why the same PC shows different rates The same PC shows different rates because Xbox and PlayStation controllers use different platform paths. Xbox controllers on Windows use the XInput path, while PlayStation controllers use the HID path that a filter driver can attach to, Tier 3. DualSense wired is about 250 Hz typical, while Xbox wired is about 125 Hz typical, Tier 3. The path matters because it decides what the operating system can change. A filter driver attaches to the HID path, so it can ask a PlayStation controller for reports more often. The Xbox path does not offer the same hook, so the same trick does not carry over. That is the whole fork, in one paragraph. Controller and connection Native rate What changes the rate Xbox, wired About 125 Hz, typical Nothing. The firmware declares the interval. Xbox, Bluetooth About 125 Hz, lower and more variable Nothing. Same platform rate. Xbox, Wireless Adapter Steadier than Bluetooth, no rate number Nothing. Steadier, not faster. DualSense, wired About 250 Hz, typical A filter driver can raise the Windows poll rate on PC. The full DualSense detail lives in the PS5 polling guide, PS5 Controller Polling Rate Test Guide. That post owns DualSense. This post owns the Xbox side of
PS5 Controller Polling Rate Test Guide
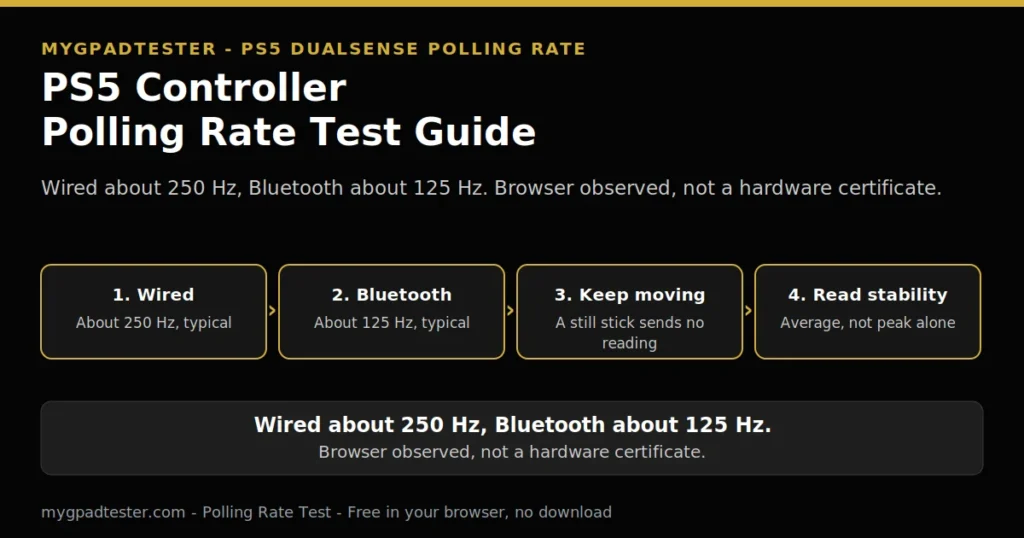
Your browser test shows 125 Hz, but you expected 250 Hz from your DualSense. Is the controller broken? Is the cable bad? Most of the time, the answer is none of those. A browser number is not the same as a hardware number, and a still stick can pull the reading down on its own. Polling rate, in Hz, is how often a controller reports a fresh reading. This guide gives you the DualSense numbers, the browser test in order, and the reading rule. A browser result is browser observed, via the Gamepad API, gated by frame rate. It is for comparison and stability, not for certifying hardware Hz. For the general numbers, see the polling rate ladder. Last updated: 16 November 2026 | Category: Controller Testing Tools | Reading time: about 15 minutes | Tested with Chrome/Edge, Gamepad API Quick Answer Your DualSense runs at about 250 Hz wired and about 125 Hz over Bluetooth, both typical browser observed readings, not Sony specifications. Test it wired first in Chrome or Edge while you keep moving a stick, then repeat over Bluetooth. Read the average and the stability, not the peak alone. A steady 250 Hz wired reading is normal. Test your DualSense polling rate No download. No account. Data stays in your browser. What rate the DualSense runs at A PS5 DualSense runs at about 250 Hz wired and about 125 Hz over Bluetooth. Both numbers are typical, browser observed readings, not Sony specifications. The wired number means a report interval of about 4 ms, and the Bluetooth number means about 8 ms. Use these numbers as a comparison guide, not as a hardware certificate. Report interval is the time between two reports. The maths is Tier 1: 1000 divided by Hz. So 125 Hz is 8 ms, 250 Hz is 4 ms, 500 Hz is 2 ms, and 1000 Hz is 1 ms. Say report interval, not wait, for these maths-only numbers. Typical means most DualSense pads read near this number in a browser test. Wired means a USB data cable to the PC, into a direct port, not a hub. How to test it in the browser, step by step Connect the DualSense wired first, then open the Polling Rate Test in Chrome or Edge. Keep moving a stick the whole time so the controller keeps reporting new readings. Read the average rate and how steady it stays, not the peak alone. Allow about 15 minutes for the full run, with a repeat over Bluetooth. Chrome and Edge are reference browsers for testing. Firefox has basic support. Safari and mobile have limited support. Use the same browser for both runs. The 7 steps in order Step 3 is the step most readers miss. A still stick sends no new reading, so the test has nothing to count. Move a stick in slow, steady circles for the whole run. For Step 4, read the average rate and how steady it stays. A high peak with wide jumps is not a good result. Test checklist Check What to do Same browser Use Chrome or Edge for both runs. Same connection Test wired first, then Bluetooth, as two runs. Keep moving a stick Move a stick in slow, steady circles. Compare one change only Compare before and after one change only. Record stick, direction, value, connection, and browser for each reading. Why the browser shows 125 Hz when it should be 250 Hz The browser shows what it observes through the Gamepad API, gated by frame rate, not the hardware rate itself. A still stick sends no reading, so the number can fall to 125 Hz on a wired pad. A 60 Hz display reads in 16.7 ms frames, which limits what the browser can observe. Keep moving a stick and retest wired. Frame interval maths is Tier 1: 60 Hz is 16.7 ms, 120 Hz is 8.3 ms, 144 Hz is 6.9 ms, and 240 Hz is 4.2 ms. The browser reads the controller through a poll loop, and the frame rate gates what it can observe. Never promise 1000 Hz in a browser on a 60 Hz display. Polling rate and refresh rate are independent variables, so never state a rule that one should be higher than the other. The Gamepad API exposes the controller description, buttons, axes, and timestamps. Axes run from minus 1.0 to 1.0, for X and Y, Tier 1. What it cannot tell you is the hardware Hz. Gamepad API Explained, owns the full API explanation. If the wired reading rises to about 250 Hz once the stick keeps moving, the pad was reporting normally all along. Why Bluetooth is slower than wired Bluetooth polls lower and more variable than wired, and that is normal for this connection. The DualSense typically reads about 125 Hz over Bluetooth, browser observed, against about 250 Hz wired. Idle throttling can lower the reading further on some devices, firmware, and browsers. Compare the two readings in the same browser, with the same stick movement. Bluetooth polling is typically lower and more variable than wired, Tier 3, typical. It varies by controller, adapter, and operating system. The general comparison belongs to the USB vs Bluetooth polling post, which owns it. Bluetooth idle throttling can lower the reading on some devices, firmware, and browsers, with can only, never as a universal rule. For comparison only, one sentence: Xbox Bluetooth reads about 125 Hz, lower and more variable, Tier 3, typical, browser observed. Can you raise it to 1000 Hz, and is it safe? You can raise the rate to 1000 Hz on a PC only, wired only, with PC tools. There is no console-side polling setting, and no steps for overclocking are given here. The full procedure belongs to the separate overclocking guide, named in Related Guides. Do not chase a bigger number before you know your normal wired reading. Overclocking a DualSense to 1000 Hz is PC only, wired only, with PC tools, Tier 3, typical. The console
What Is Controller Circularity Error and How to Test It

Your stick draws a rounded square, not a circle. You push it around the edge and the trace comes back with flat sides and sharp corners. Is the stick worn out? That question is fair, and one bad trace does not answer it. This post explains what the trace means, how to test it right, and what to do next. Last updated: 16 November 2026 | Category: Controller Testing Tools | Reading time: about 17 minutes | Tested with Chrome/Edge, Gamepad API Quick Answer Circularity error is how far your stick trace strays from a perfect circle at full deflection. It is a full deflection test, not a rest test. Sweep slowly in a full circle, both directions, each stick separately, then read the result only after full coverage. Repeat the sweep before you judge the stick. test the rest reading first No download. No account. Data stays in your browser. Circularity is a full deflection test. Drift is a rest test. The two tests measure different things, so a bad trace is not the same as drift. Start with the rest reading on the Stick Drift Test, then read this post for the full deflection reading. The deadzone post explains the setting that hides small movement, not the test itself. What circularity error is, in plain words Circularity error is how far your stick trace strays from a perfect circle at full deflection. The test reads the outer edge, so you must push the stick fully out and cover the whole circle before you read anything. A trace that stays close to a circle reads well. A trace that pulls in or flattens out reads worse. The browser reads the stick on two axes, X and Y, from minus 1.0 to 1.0, Tier 1. At full deflection the reading sits at the outer edge. The trace is the path the reading draws as you sweep around that edge. Each reading carries a timestamp. A perfect circle would mean the reading stays at the same distance from the centre all the way around. Real sticks rarely draw that. The gap between the trace and a perfect circle is the error. The result is browser observed, via the Gamepad API, Tier 1 concept. It is for comparison and stability, not for certifying a hardware grade. Read it as a trace shape, not as a verdict on its own. How to test it, step by step Rest the stick, then push it to full deflection and sweep slowly in a full circle. Sweep one circle in one direction, then a second full circle the other way. Test each stick on its own. Read the result only after full coverage, then repeat the sweep before you judge anything. Allow about 15 minutes for the full run. The 7 steps in order Work the steps in order. Test the left stick first, then the right stick, each on its own. Keep the controller flat and untouched for the rest reading, for 30 to 60 seconds. Record stick, direction, value, connection, and browser for each reading. Chrome and Edge are reference browsers for testing. Firefox has basic support. Safari and mobile have limited support. What a good or bad reading means, honestly Sources disagree on scoring, so this post gives no band and no good number. Three reported systems use different scales, and they do not agree with each other. That is why one number cannot grade your stick on its own. Read the trace instead, compare your two sticks, and repeat before you judge it. One reported system calls 6 to 9 percent the factory standard, Tier 3 at best. A second system scores out of 100, with 90 percent and above called excellent and below 65 percent called significant wear. A third system calls under 10 percent excellent and over 20 percent poor. The three systems disagree, so none of them is used here as fact. Read the trace instead. Compare your two sticks with each other. Compare before and after one change only. Repeat the sweep before you judge the stick. A reading proves a trace shape, not a cause. Circularity error is not stick drift Drift is read at rest, with the stick untouched. Circularity is read at full deflection, with the stick pushed fully out and swept around the edge. The two tests measure different things, so a bad trace is not drift and drift is not a bad trace. Test each one the right way, and read each result on its own. House drift scale, tester convention every time, never a vendor specification. Flickers within 0.02 to 0.03 is normal noise, no fix needed. A steady offset of 0.05 to 0.10, in the same direction, is measurable mild drift. A steady offset above 0.10, or creeping in one direction, is clear drift. Random jumps, even untouched, mean debris, a loose stick, or a failing sensor. For mild drift, clean, calibrate, use a deadzone bridge, retest, and monitor. For clear drift, clean, calibrate, then decide repair versus replace. Read what stick drift is for the rest test in full. That post owns the drift definition. Does it mean my stick is worn out or damaged? A trace shape alone does not prove wear or damage. It proves a shape, not a cause. The sensor inside the stick, the gate around it, and the sweep itself can each shape the trace. Before you call the stick worn out, check the sweep, compare the two sticks, and look at the rest reading too. Most sticks use a potentiometer, Tier 2, from the iFixit Hall effect page. A potentiometer is a variable resistor that forms a variable voltage divider. Moving the stick moves a conductive wiper against a resistive contact pad, which varies the resistance and therefore the output voltage. The controller reads that voltage as a position. Two potentiometers per stick, one for X and one for Y. The resistive contact pads wear down from friction, Tier 2, same iFixit source.
Gamepad API Explained
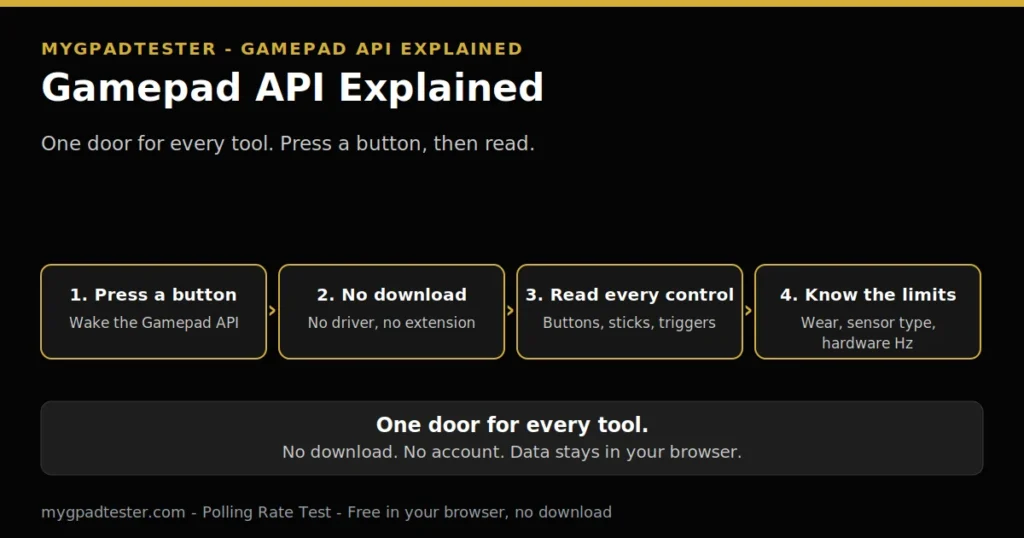
You open the tester, and it shows nothing. You did not press anything yet. Do you need a driver? Do you need an app? Is the controller broken? The short answer is no. The browser already has what it needs. It just waits for one press first. Last updated: 16 November 2026 | Category: Controller Testing Tools | Reading time: about 18 minutes | Tested with Chrome/Edge, Gamepad API Quick Answer The Gamepad API is the browser feature that lets a web page read your controller. You need no download, no driver, and no extension. Press a button to wake it, then test every control in Chrome or Edge. The browser shows buttons, sticks, triggers, and polling. It cannot tell you wear, sensor type, or hardware Hz. Test your polling rate Test every button No download. No account. Data stays in your browser. Every tool on this site reads the controller through the same door, the Gamepad API. If you understand this one post, every other post makes sense. The two tools above are the places you use next. What the Gamepad API is, in plain words The Gamepad API is the browser interface that lets a web page read a connected controller. It is a standard door, not an app. Every tool on this site uses the same door. It gives each tool buttons, axes, and a timestamp. You open a page, press a button, and the browser reads the pad. Think of it as a door between the browser and the controller. The operating system sees the controller first. The browser then reads it through that door. The page asks the browser, and the browser hands back the reading. The API is a W3C standard. W3C is the web standards body. A standard means browsers agree on the shape of the reading. The shape is the same in Chrome, Edge, and Firefox. One plain mention is enough for the mechanism. The page calls navigator.getGamepads() to get the list of connected pads. That call returns the list only after the wake press. Before that press, the list is empty. That empty list is normal, not a fault. Why the browser sees nothing until you press a button The pad stays unexposed until a gamepad user gesture is detected, then it is exposed to the page. A button press is that gesture. Before the press, the browser keeps the pad hidden from the page. After the press, the page can read it. A blank test before any press is normal, and it proves nothing about the controller. Press any button to wake the Gamepad API. A blank test before any press is normal. That rule is a privacy guard against fingerprinting, not a bug. A web page should not learn about your controller before you show that you want to use it. The press is your signal. The W3C Gamepad API spec describes this as a user gesture check. The wake step is simple. Plug in or pair the controller first. Open the tester. Press any button once. The tester should then show the controller. If it still shows nothing, the fault sits earlier, in the operating system layer. That fix belongs to the detection post, linked in H2 5. Keep the page in view when you press. In Firefox, gamepads are only exposed to a page when the user interacts with one with the page visible, Tier 2, MDN. Once one gamepad has been interacted with, other connected gamepads become visible automatically. How the browser reads input: it asks, again and again The browser does not get told when a stick moves. It asks, again and again, in a poll loop, usually once per animation frame. Only connect and disconnect are events. Each ask returns a fresh sample. A stick value is one sample in time, not a live wire from the stick to the page. An animation frame is one picture the browser draws. On a 60 Hz display, the browser draws about 60 frames each second. The tester asks for a new reading on each frame. That ask is the poll loop. It keeps asking while the page is open. That is why a reading can look jumpy. Each sample catches the stick at one moment. Hold the stick still, and the samples should sit close together. A wide spread means an unstable reading, not a broken stick by itself. The timestamp on each reading matters here. It marks when the sample was taken. That is how the tester can count how often new readings arrive. That count is the polling reading, covered in H2 8. Buttons and axes, in plain words Buttons are objects with pressed and value. Axes run from minus 1 to 1, X and Y per stick, with a timestamp on each reading. A button tells you pressed or not, plus how far it is pressed. An axis tells you where a stick sits, left or right, up or down. Together, they describe every control on the pad. A button has two parts. Pressed is yes or no. Value runs from 0 to 1. A trigger is an axis, not a button. It moves from 0.00 to 1.00 as you pull it. Rest above 0.02 needs a check, and full pull below 0.98 needs a check, Tier 3 tester convention, never a vendor specification. An axis runs from minus 1 to 1. Minus 1 is full left or full up. Plus 1 is full right or full down. Zero is centre. Each stick has two axes, X and Y. When the browser recognises the controller layout, mapping is standard, Tier 2. Standard mapping means 17 buttons and 4 axes in fixed positions. A stick is never exactly 0 at rest in every reading. Small resting flicker is normal noise. House drift scale, tester convention every time, never a vendor specification. Flickers within 0.02 to 0.03 is normal noise, no fix needed. A steady offset of 0.05 to 0.10, in the same direction,
Best Browser for Gamepad Testing

Same controller, different result in every browser? One browser shows a reading. Another shows nothing. Vibration stays silent in one place and works in another. Button names change. The pad did not change. The browser did. Last updated: 15 November 2026 | Category: Controller Testing Tools | Reading time: about 20 minutes | Tested with Chrome/Edge, Gamepad API Quick Answer Use Chrome or Edge on desktop for the fullest controller test. Best means the fullest test, not the fastest browser. Chrome and Edge are reference browsers for testing. Firefox has basic support. Safari and mobile have limited support. Test in Chrome or Edge first, then retest in a second browser before blaming the controller. run the polling rate test No download. No account. Data stays in your browser. The Gamepad API is the built-in browser feature that lets a page see the controller. Browsers differ in what the Gamepad API exposes. Vibration, mapping, and reported inputs can differ from one browser to the next. Pick the fullest one first. Then retest in a second browser before you blame the controller. The answer: Chrome or Edge on desktop Chrome or Edge on desktop gives the fullest controller test. Both are reference browsers for testing, so start there. Firefox has basic support, and Safari and mobile have limited support. Run the full test once in Chrome or Edge. Then retest in a second browser before you call a fault. What Best means here Best means the fullest test in this post. It does not mean the fastest browser. No speed ranking appears here. Which browser lets you see the most of your controller, with the fewest limits? On desktop, the answer is Chrome or Edge. The Polling Rate Test shows browser differences well. Use it first in Chrome or Edge. Then use the same reading, in the same browser, on the same connection, before and after each change, one variable at a time. That is the retest rule. Pick first, retest second Pick Chrome or Edge first. Test every control once. Then retest in a second browser, with the same controller and the same connection. If the second browser shows the same fault, check the pad and the connection next. If only one browser shows it, check the browser first. How to Test a USB Gamepad Online covers the wired setup. How to Test a Bluetooth Controller in Browser covers the wireless setup. Vibration by browser Vibration differs by browser and by the vibration path the browser exposes. The modern vibration path is listed as No for Firefox in the compatibility table checked 13 Nov 2026, while Firefox lists an older haptic path. Support may vary by platform and controller. A silent test in one browser is not proof of a fault. Why vibration differs by browser Vibration is output. Motors make the rumble. A trigger press is input on an axis (Tier 1 concept plus Tier 2 spec). That split matters. A silent motor does not prove the input side is broken. Test each side on its own. The modern vibration path is the vibrationActuator property and its playEffect action, in plain words the current way a browser asks the pad to rumble. The older haptic path is the earlier way the same request was exposed. MDN lists the modern property as Limited availability. It is not Baseline, because it does not work in some widely used browsers (Tier 2, MDN, checked 13 Nov 2026). Even if the controller supports haptic feedback, the platform may not support it. Table 1 values come from the MDN compatibility table mirror, checked 13 Nov 2026. The modern path is listed as No for Firefox, while the older haptic path is listed at first support 55 (Tier 2, MDN-derived, checked 13 Nov 2026). Read both paths together. To check your own pad, test vibration in Chrome or Edge first, then retest in a second browser. What no rumble means, and what it does not mean No rumble in one browser means the browser, the platform, or the controller did not complete the vibration request in that test. It does not mean the motors are broken, or the input side is broken. Retest in Chrome or Edge before any fault call, with the same controller and the same connection. Browser feature matrix Table 1 gives the dated matrix. Read the vibration column as the modern path only, except for the Firefox row, which names both paths. Browser Gamepad API first support Vibration, modern path First support note Check date Chrome 21 (Tier 2, MDN-derived) First support 68 (Tier 2, MDN-derived) First support only. 13 Nov 2026 Edge 12 (Tier 2, MDN-derived) Supported in current Chromium Edge. No version printed. No version printed. 13 Nov 2026 Firefox 29 (Tier 2, MDN-derived) Modern path listed as No. Older haptic path first support 55 (Tier 2, MDN-derived). Read both paths. 13 Nov 2026 Safari on Mac 10.1 (Tier 2, MDN-derived) First support 16.4, desktop vibration only (Tier 2, MDN-derived) First support only. 13 Nov 2026 Safari on iOS 10.3 (Tier 2, MDN-derived) Limited support. No vibration value printed. No value printed. 13 Nov 2026 Chrome on Android 25 (Tier 2, MDN-derived) First support 68 (Tier 2, MDN-derived) First support only. 13 Nov 2026 First support is not a recommendation. Use the latest Chrome or Edge for the fullest test. All version numbers above are Tier 2 MDN-derived first-support values, checked 13 Nov 2026. Support may vary by platform and controller. A silent vibration test in one browser is not proof the motors are broken. Retest in Chrome or Edge before any fault call. Chrome vs Edge Chrome and Edge match closely for gamepad testing. Both share the Chromium engine, so Gamepad API behaviour matches closely too. The choice between them is small. The bigger choice is desktop Chrome or Edge against a limited browser for vibration. Pick either one, then retest in a second browser. Same engine, closely matching behaviour Chrome and Edge share the Chromium engine (Tier
How to Test a Bluetooth Controller in Browser

Last updated: 15 November 2026 | Category: Controller Testing Tools | Reading time: about 20 minutes | Tested with Chrome/Edge, Gamepad API Quick Answer Pair the controller in the operating system first. Then open the tester in Chrome or Edge and press a button to wake the Gamepad API. Test every control once: buttons, sticks, triggers, polling, and lag. Read each result against its scale in this post. If a reading fails, the layer order below names the next check. press a button to wake the test No download. No account. Data stays in your browser. Bluetooth is a connection, not a test. The Gamepad API is the browser feature that lets a web page read the controller, over Bluetooth or USB. What changes over Bluetooth is the path: operating system pairing first, then the browser, then the reading. If any layer fails, the reading fails, and the fix belongs to that layer. Pairing layer vs browser layer Paired means the operating system sees the controller, not that the browser can read it yet. Pairing and browser reading are two layers. Check the pairing layer first. Only when the controller is paired to this device can the browser test begin. What Paired proves Paired proves the operating system sees the controller. It says nothing about the browser yet. Keep the two layers apart. What Paired does not prove Paired does not prove the browser can read the controller. It does not prove the pad will pass a test. The browser cannot test what the operating system does not see. Fix the OS connection first, then retest in the browser. If the operating system does not see the pad at all, use the OS detection fixes. That post owns the operating system fix order. Paired to another device nearby A controller paired to a different nearby device is invisible to this browser. That is a pairing problem, not a browser problem. Confirm it is paired to this device before any browser step. Layer What happens If it fails Operating system layer Controller pairs to this device. Browser sees nothing. Fix pairing first. Browser layer Button press wakes the reading. Tester stays blank. Press a button, then read. Press a button first, and why A blank tester before you press anything is normal. The browser shows the controller only after you press a button on it. That press is the wake step. It tells the browser the pad is in use. Press a button first, then read the test. Do not call a blank test a fault. The wake step Press any button to wake the Gamepad API. A blank test before any press is normal. The W3C Gamepad API spec describes the rule as a user gesture check, Tier 2. In plain terms, the pad stays unexposed until a gamepad user gesture is detected, then it is exposed to the page. In spec terms, getGamepads() returns an empty list until that gesture has been detected. Pressing a button on the controller is the gesture that wakes it. Then use the Button Test for the first control check. Why a blank test is normal A blank test means no gesture has been seen yet. It does not mean the pad is broken. Press a button, keep the page in view, then look again. The Firefox page-visible note Firefox adds one limit, Tier 2, noted by MDN. In Firefox, gamepads are only exposed to a page when the user interacts with one with the page visible. Once one gamepad has been interacted with, other connected gamepads become visible automatically. This helps prevent gamepads from being used for fingerprinting. USB vs Bluetooth: what each path proves USB proves the controller and the browser path, while Bluetooth adds pairing, the adapter path, and interference to the same browser test. The same controller can pass on one path and fail on the other. That result names the path, not the controller. Test USB first to split the fault Test USB first when Bluetooth shows nothing. If USB passes, the fault sits in the Bluetooth path. If USB also fails, the fault sits earlier. Keep the same browser for both runs. The full USB test setup belongs to How to Test a USB Gamepad Online, the wired reference for this fork. The Bluetooth chain below adds pairing and wake steps first. Table 1: USB vs Bluetooth Path What it proves What it does not prove USB wired test The controller sends input, and the browser reads it through the Gamepad API. It does not prove Bluetooth pairing, the adapter path, or freedom from interference. Bluetooth test The full Bluetooth path works: OS pairing, browser wake, and reading over Bluetooth. It does not prove the controller is broken when it fails. A fail here names the path first, not the controller. The same controller can pass on one path and fail on the other, and that names the path, not the controller. What a pass on one path means Bluetooth polling is typically lower and more variable than wired, Tier 3, typical. It varies by controller, adapter, and operating system. A pass on USB with a fail on Bluetooth names the Bluetooth path. How to test a Bluetooth controller, step by step Test in one order: pair, wake, buttons, sticks, triggers, polling, lag. Test every control once, then test drift last with hands off. Record each reading as you go. Allow about 15 minutes for the full run. One order, one record, and no skipped control gives a clear result. Before you start When the browser recognises the layout, mapping is standard, Tier 2. Standard mapping means 17 buttons and 4 axes in fixed positions. The browser mapping names each button, not the printed label. Stick axes run from minus 1.0 to 1.0, for X and Y, with magnitude and timestamp behind each reading, Tier 1. The 8 steps in order Work the steps in order. Do not skip the pair and wake steps. For Step 4,
How to Test a USB Gamepad Online (Button, Stick, Trigger, Polling, Lag)
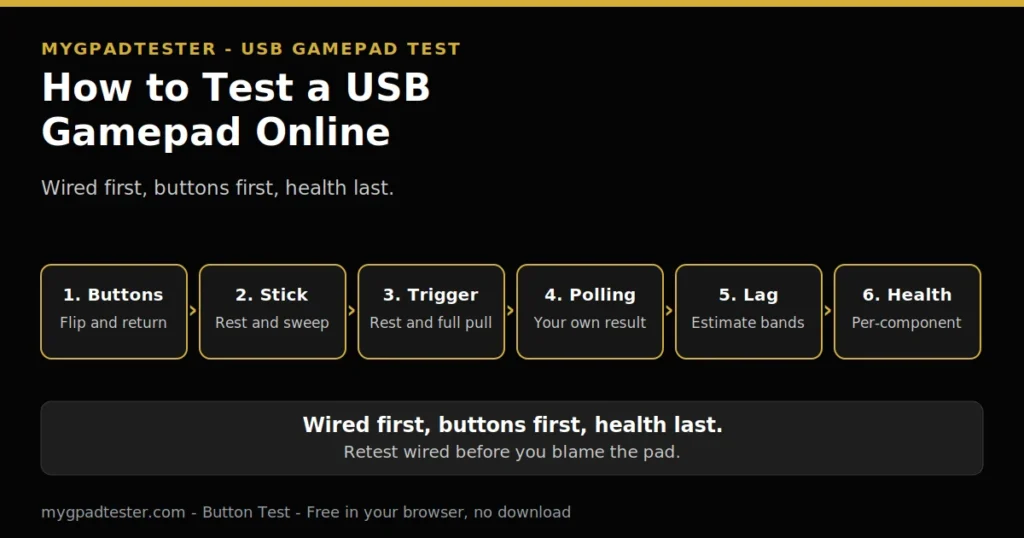
You plugged the pad in with USB, opened the tester, and now you want proof it all works? Last updated: 14 November 2026 | Category: Controller Testing Tools | Reading time: about 10 minutes | Tested with Chrome/Edge, Gamepad API Quick Answer Plug the pad in with a data cable, open the tester in Chrome or Edge, and press a button to wake the Gamepad API. Then test in order: buttons, stick, trigger, polling, lag, and health. Read each result against its scale below. A wired run gives the clean baseline, so retest wired before you blame the pad. Open the Button TestNo download. No account. Data stays in your browser. Before you start: wake, browser, cable A USB test is a wired baseline. The pad, the cable, the port, and the browser must be right before any reading counts. Press any button to wake the Gamepad API. A blank test before any press is normal. The browser cannot test what the operating system does not see. Fix the OS connection first, then retest in the browser. If the pad does not appear at all, that guide owns the fault tree, and this post moves on. The browser reads the pad through the Gamepad API. Axes run from -1.0 to 1.0. Buttons run from 0.0 to 1.0, where 0.0 means fully unpressed and 1.0 means fully pressed (Tier 1, W3C Gamepad API). The spec also defines a centre position value for an axis designed to return to centre (Tier 1, W3C). That centre value is the basis for the rest reading in the stick test. Use Chrome or Edge for the test. Chrome and Edge are reference browsers for testing. Firefox has basic support. Safari and mobile have limited support. Use the same browser for every retest you compare. In Firefox, gamepads are only exposed to a page when you interact with one while the page is visible, which helps prevent fingerprinting (Tier 2, MDN, MDN Gamepad API guide). Press a button first, then read. The setup steps below are house test logic, Tier 3, not a vendor instruction. Use a data-capable cable, not a charge-only cable. Plug into a direct USB port on the computer, not a hub. Close Steam Input and DS4Windows before retesting, because they can remap or hide the raw input. Then run the test order: buttons, stick, trigger, polling, lag, health. What drift is matters in the stick step. The test order in full Allow about 15 minutes for the full run. Work the steps in order and record each reading as you go: stick, direction, value, connection, browser. That record is what the retest compares against. Step Tool What to read What a pass looks like 1 Button Test Each button, pressed once slowly in order Every button flips and returns, none sticks 2 Stick Drift Test Rest reading, then a full deflection sweep Rest within 0.02 to 0.03, or a steady offset read against the house scale 3 Trigger Test Trigger axis, rest and full pull Rest 0.02 or below, full pull 0.98 or above 4 Polling Rate Test Your own result, read with the Tier 1 interval maths A stable reading you can compare across runs, not a promised Hz figure 5 Input Lag Test Browser estimate bands only Under 8 ms excellent, 8 to 16 ms normal, over 16 ms investigate 6 Gamepad Health Checker Per-component pass or fail Each component passes on its own, sticks, buttons, triggers, vibration, connection This order is house procedure, Tier 3, not a vendor procedure. Each step gives its own verdict, and no single number decides the pad. Button test first Press each button once slowly in order. Watch each press flip and return. A button that flips cleanly and comes back is a pass. A button that sticks, fires twice, or never fires needs a closer look. The button test method owns per-button diagnosis, and this post does not repeat it. Stuck buttons, double input, and dead buttons each have their own cause, so use that post to name the fault once this step flags it. Press the face buttons, the shoulders, the D-pad in each direction, and the stick clicks L3 and R3. Go slowly. A fast mash hides a sticky button, because the next press can mask the one that did not return. If a button fails here, note which button it is and finish the run. A single bad button does not cancel the stick, trigger, polling, and lag readings. Fix the button fault with its own guide after. Stick and trigger readings Open the Stick Drift Test and put the pad flat and untouched for 30 to 60 seconds. Read the rest result on the house drift scale, labelled tester convention every time, never a vendor specification. Flickers within 0.02 to 0.03 is normal noise. A steady offset of 0.05 to 0.10 is mild. Above 0.10 or creeping is clear drift. Random jumps while untouched mean debris, a loose stick, or a failing sensor. The drift test method owns the full drift test, and this post uses the scale only to read the rest result. Test each stick separately, left and right, and note the direction and the value for each one. A reading on one stick says nothing about the other stick. Then run a full deflection sweep. Push each stick to full deflection in each direction and let it return. Watch the trace through the sweep, not just the rest number. A stick that tracks smoothly and settles at centre is a pass. A stick that jumps, sticks, or settles off centre needs the drift guide next. If the stick spikes past centre into the opposite direction only on release, that reading belongs to the snapback post, Snapback vs Stick Drift. Do not call a release spike drift. Drift is a steady offset that stays while the stick is untouched. If the rest reading is mild drift, a deadzone can bridge it while you decide the next
Nintendo Switch Joy-Con Drift Fix
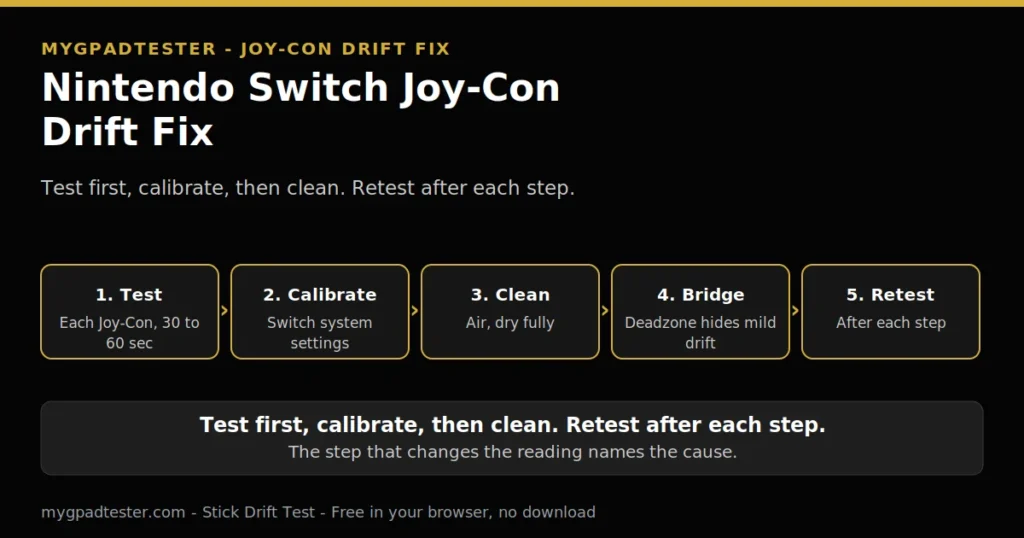
Your Joy-Con stick keeps moving on its own, even when your hands are off? The character walks, the camera drifts, and the menu scrolls by itself. Test it first, then work the Joy-Con steps in order. Last updated: 13 November 2026 | Category: Controller Testing Tools | Reading time: about 8 minutes | Tested with Chrome/Edge, Gamepad API Quick Answer Test each Joy-Con on its own first, then recalibrate the drifting stick in the Switch system settings, clean around the stick base, and bridge mild drift with a deadzone setting. Retest after each step. Calibration resets the center point and sometimes helps. It never promises a fix, and cleaning cannot repair worn hardware. Test the stick firstNo download. No account. Data stays in your browser. What a drifting Joy-Con reports What drift is is simple: the stick reports movement while your hands are off it. Joy-Con sticks are small, detachable, and see heavy use. Wear and debris both show up as drift, and the fix order below tests first so you know which one it is. Read every result on the house drift scale, labelled tester convention every time, never a Nintendo specification. Flickers within 0.02 to 0.03 is normal noise. A steady offset of 0.05 to 0.10 is mild. Above 0.10 or creeping is clear drift. Random jumps while untouched mean debris, a loose stick, or a failing sensor. Joy-Con is a distinct platform entity with its own fix order. The Pro Controller has its own detection post, linked later in this post. Check it first: the 60-second Joy-Con test Test each Joy-Con separately, left and right, and note which one drifts. Put the controller flat and untouched for 30 to 60 seconds. Record the stick, the direction, the value, the connection, and the browser. That record is the baseline the retest compares against. The drift test method owns the method in depth, and this post does not re-teach it. Read the result on the house scale above, tester convention every time. Normal noise needs no fix. Mild drift means calibrate, clean, bridge with deadzone, retest, monitor. Clear drift means calibrate, clean, bridge, then the repair versus replace decision. Random jumps mean debris, a loose stick, or a failing sensor. Clean carefully, retest wired, then decide. Reading What it means What to do next Flickers within 0.02 to 0.03 Normal noise No fix needed, monitor Steady offset 0.05 to 0.10 Mild drift Calibrate, clean, deadzone bridge, retest, monitor Above 0.10 or creeping Clear drift Calibrate, clean, deadzone bridge, then repair versus replace decision Random jumps, even untouched Debris, loose stick, or failing sensor Clean carefully, retest wired, then decide This scale is a tester convention, not a Nintendo specification. Some other testers use above 0.15 as their replace threshold. This site uses the scale above for consistency. Never use 0.15 as the house threshold. Press any button to wake the Gamepad API. A blank test before any press is normal. The browser cannot test what the operating system does not see. Fix the OS connection first, then retest in the browser. If the whole Joy-Con is blank in the test, stop here. Fix detection first, drift fix second. The Switch Pro Controller not detected guide owns the detection steps. A Joy-Con the browser cannot see cannot be drift tested. Why the small Joy-Con stick wears A Joy-Con stick reads position with a potentiometer. A potentiometer is a variable resistor that forms a variable voltage divider. Moving the stick moves a conductive wiper against a resistive contact pad, which varies the resistance and therefore the output voltage. The controller reads that voltage as a position. Two potentiometers per stick, one for X and one for Y (Tier 2, iFixit). The resistive contact pads wear down from friction. Every stick movement removes a minuscule amount of material. Once the resistance value of the neutral position changes, the controller reads a different voltage than expected while stationary and interprets it as input. That is drift (Tier 2, iFixit). All three major console manufacturers use potentiometer-based joysticks, including the Joy-Con (Tier 2, iFixit teardown). Potentiometer wear is explained in depth in the Hall versus potentiometer post. Joy-Con sticks are small, so the same wear shows up sooner in gameplay than on a larger stick. A dirty stick can look exactly like a worn one until it is cleaned, so the test still comes first. Hall effect sticks are not drift-proof either, and this post does not claim otherwise. Even Hall effect sticks can develop drift from other causes, and a weak centering spring is one documented cause (Tier 2, iFixit). Joy-Con fix order: test, calibrate, clean, bridge, retest Six layers, in order. Allow about 20 minutes, including drying time after cleaning. Work them in order, one variable at a time, retest after each one. A fix you cannot measure is a guess. 1. Test first. Done in the section above. Flat and untouched, 30 to 60 seconds, each Joy-Con separately, record stick, direction, value, connection, browser. This is the baseline. Retest. 2. Switch calibration: reset the center point. Nintendo documents this calibration, and it resets how the Switch reads the stick center (Nintendo Support, Tier 2). From the HOME Menu, select System Settings, then Controllers and Sensors, then Calibrate Control Sticks. Tilt the control stick in any direction for a few seconds on the controller you want to calibrate, then follow the on-screen prompts to verify the control stick functionality. Press the X button to make a recalibration. Without the X button press, only a calibration test is made, not a recalibration (Tier 2, Nintendo Support). Retest. Calibrate the drifting stick only, then retest with the same method. Calibration resets the center point. It does not repair worn hardware. If calibration changes nothing, the fault is debris or wear, not a setting. Do not repeat it again and again. Retest. 3. Clean: power off, warranty check first. Power the controller off. Check the warranty before any opening step. While covered, contact Nintendo
PS4 DualShock 4 Stick Drift Fix

PS4 DualShock 4 Stick Drift Fix Your DualShock 4 stick keeps moving on its own, even when your hands are off? The camera drifts, the character walks, and the menu scrolls by itself. Test it first, then work the DualShock 4 steps in order. Last updated: 13 November 2026 | Category: Controller Testing Tools | Reading time: about 8 minutes | Tested with Chrome/Edge, Gamepad API Quick Answer Test the stick first, then reset the DualShock 4 with the pinhole button, clean around the stick base, and bridge mild drift with a deadzone setting. Retest after each step. Sony calls the reset often the first troubleshooting step, and it sometimes helps. It never promises a fix, and cleaning cannot repair worn hardware. What drift means on a DualShock 4 What drift is is simple: the stick reports movement while your hands are off it. That usually means wear inside the stick. The house drift scale applies, labelled tester convention every time, never a Sony specification: flickers within 0.02 to 0.03 is normal noise; steady offset 0.05 to 0.10 is mild; above 0.10 or creeping is clear drift. Sony’s framing stays soft: the reset can sometimes resolve drift, and if not, it may indicate wear and tear needing professional repair or replacement (Tier 2, Sony manual). This post never promises the reset fixes drift. The fix order below is the DualShock 4 order: test, Sony reset, clean, deadzone bridge, PC layer, repair versus replace. It runs parallel to the PS5 DualSense fix and the Xbox fix, but every step here is DualShock 4 specific, with no PS5-style calibration menu. Its calibration layer is the Sony reset plus a deadzone bridge. Test first: is it really drift? Open the stick test and leave the pad flat and untouched for 30 to 60 seconds. Record the stick, the direction, the value, the connection, and the browser. Each stick reports an X axis and a Y axis, each from minus 1.0 to 1.0 (Tier 1, Gamepad API). That record is the baseline the retest compares against. The drift test method owns the method in depth, and this post does not re-teach it. Read the result on the house scale, tester convention every time. Flickers within 0.02 to 0.03 is normal noise, and no fix is needed. A steady offset of 0.05 to 0.10 is mild drift: clean, bridge with deadzone, retest, monitor. Above 0.10 or creeping is clear drift: clean, bridge, then the repair versus replace decision. Random jumps while untouched mean debris, a loose stick, or a failing sensor: clean carefully, retest wired, then decide. Reading What it means What to do next Flickers within 0.02 to 0.03 Normal noise No fix needed, monitor Steady offset 0.05 to 0.10 Mild drift Clean, deadzone bridge, retest, monitor Above 0.10 or creeping Clear drift Clean, deadzone bridge, then repair versus replace decision Random jumps, even untouched Debris, loose stick, or failing sensor Clean carefully, retest wired, then decide This scale is a tester convention, not a Sony specification. Some other testers use above 0.15 as their replace threshold. This site uses the scale above for consistency. Never use 0.15 as the house threshold. If the whole controller is blank in the test, stop here. Fix detection first, drift fix second. Fix detection first in the generic not-detected guide. A pad the browser cannot see cannot be drift tested. Why a DualShock 4 stick drifts A DualShock 4 stick reads position with a potentiometer. A potentiometer is a variable resistor that forms a variable voltage divider. Moving the stick moves a conductive wiper against a resistive contact pad, which varies the resistance and therefore the output voltage. The controller reads that voltage as a position. Two potentiometers per stick, one for X and one for Y (Tier 2, iFixit). The resistive contact pads wear down from friction. Every stick movement removes a minuscule amount of material. Once the resistance value of the neutral position changes, the controller reads a different voltage than expected while stationary and interprets it as input. That is drift (Tier 2, iFixit). All three major console manufacturers use potentiometer-based joysticks, including the DualShock 4 (Tier 2, iFixit teardown). Potentiometer wear is explained in depth in the Hall versus potentiometer post. Hall effect sticks are not drift-proof either, and this post does not claim otherwise. Even Hall effect sticks can develop drift from other causes, and a weak centering spring is one typical cause reported by the community (Tier 3 only). Your DualShock 4 has potentiometers, so wear is the usual cause, but the test still comes first. A dirty stick can look exactly like a worn one until it is cleaned. The DualShock 4 fix order: test, reset, clean, bridge, retest Six layers, in order. Allow about 20 minutes, including drying time after cleaning. Work them in order, one variable at a time, retest after each one. A fix you cannot measure is a guess. 1. Test first. Done in the section above. Flat and untouched, 30 to 60 seconds, record stick, direction, value, connection, browser. This is the baseline. Retest. 2. Sony reset: the pinhole procedure. Sony documents this reset, and Sony calls the reset often the first troubleshooting step (PlayStation Support, Tier 2). Work the steps exactly as Sony lists them. Turn off and unplug your PS4 console. Disconnect the controller from the official USB cable. On the back of the controller there is a tiny hole, near the L2 shoulder button, and the reset button is inside this hole. Use a small unfolded paper clip or similar to press and hold the reset button for at least five seconds. Connect the controller to the PS4 console with the official USB cable, to a USB port on the front or rear of the console. Press the PS button to pair the controller again. Retest after the reset with the same method. One variable at a time. Retest. 3. Clean: power off, warranty check first. Power the controller off. Check
What Is a Controller Health Test and What Does It Check?

What Is a Controller Health Test and What Does It Check? Your controller feels off but you cannot tell which part is failing? The stick looks fine, the buttons answer, yet something is wrong in game. A health test answers that question part by part. Last updated: 13 November 2026 | Category: Controller Testing Tools | Reading time: about 9 minutes | Tested with Chrome/Edge, Gamepad API Quick Answer A controller health test checks each part of your pad on its own and gives a pass or fail per part: sticks, buttons, triggers, vibration, connection, battery, charging port and firmware. There is no single score out of 100, because one number cannot describe a pad. A stick can fail while the buttons pass, so the result names the failing part. Run the health checkNo download. No account. Data stays in your browser. What a controller health test actually is Controller health is a composite, not a single score. That is the definition this post owns. Each component gets pass or fail, for sticks, buttons, triggers, vibration, connection, and battery, charging port and firmware where relevant. No invented 0 to 100 score, no health percentage, no grade, no rating. The rule is stated here, not implied: one part, one verdict, then read the pattern. One number cannot describe a pad. A stick can fail while the buttons pass, so a single score would hide the fault. A pad with a dead trigger and perfect sticks has one failed part, and the fix starts there. Two house rules apply before you test anything. Press any button to wake the Gamepad API. A blank test before any press is normal. The browser cannot test what the operating system does not see. Fix the OS connection first, then retest in the browser. This post owns the definition, what each component check means, how to read a result, and the retest rule. The tool page owns the interactive screening itself. Use the tool to run the checks, use this post to understand what each check means. How to read the result: pass or fail per part Read the result one part at a time. A pass means the part behaved as expected. A fail means it did not, and the table below says what that fail usually means. Count the fails and look at where they sit. One failed part is a repair candidate, and the fix lives in its own post, linked in the table. Several failed parts across the pad point at the whole pad, and that decision belongs to its own later post. This post names that fork once and stops there. A pass is only as good as the test run. Test flat and untouched for the sticks, one press at a time for the buttons, and the same browser and connection for every retest. Change one thing, then retest. What each component check means Eight checks, in the order below. Each one names what it measures and what fail looks like. 1. Sticks: rest reading, full deflection, return to center. Leave the stick alone and watch the rest reading, then push it to full deflection in each direction and let it return to center. The house drift scale applies, labelled tester convention every time, never a Sony, Microsoft or Nintendo specification: flickers within 0.02 to 0.03 is normal noise; steady offset 0.05 to 0.10 is mild; above 0.10 or creeping is clear drift. What drift is explains the fault itself. The full method is the drift test method. Fail looks like a steady offset at rest, a stick that never reaches full deflection, or one that does not return to center. 2. Buttons: pressed flips true on press and false on release. Press every button once, including stick clicks L3 and R3 and the D-pad directions. Pressed flips true on press and false on release (Tier 1, Gamepad API). A button that stays true is stuck. One that never flips is dead at the contact or not detected at the OS layer. Test every button in the button test. The six-step button test method lives in its own post. 3. Triggers: analog travel 0.00 to 1.00. Pull each trigger slowly from rest to full pull and watch the travel. Rest above 0.02 and full pull below 0.98 are tester conventions, never vendor specifications (Tier 3 typical). A trigger that never reaches full pull or rests above zero is a range fault. 4. Vibration: output on both sides. Run the vibration output check and feel for both motors. Vibration is output, trigger press is input (Tier 1, Gamepad API). Weak or dead rumble on one side only is a motor or output fault. 5. Connection: polling reading stable, no repeated dropouts. Watch the polling reading for stability. Jitter is described qualitatively only: wide, unstable, spikes and drops. A second controller that does not drop out points at the first pad, not the connection. Retest wired to isolate Bluetooth. 6. Battery: does it charge, and does it hold charge. Two real tests. First, does it charge: connect a known good data-capable cable to a known good port and watch for the charging indicator. Note whether charging starts at all. If nothing starts, change the cable first, then the port, then suspect the controller. Second, does it hold charge: charge fully, disconnect, play normally, and compare the run time against the controller’s own previous baseline, never a universal hour number. A sudden drop against its own baseline is the signal. 7. Charging port: angle dependence means wear. If charging only works when the cable is held at an angle, or works with one cable but not another, the port or cable is worn. Gentle wiggle test only, no force. 8. Firmware: update, then retest the same reading. Check for a controller or console update through the console settings or the vendor’s PC app, such as the PlayStation Accessories app on a Windows PC for a DualSense (Tier 2, PlayStation Support). Retest the