How to Test All Controller Buttons Online

How to Test All Controller Buttons Online One button feels dead and you cannot tell which one it is? Or a button works in one game and not in another, and you need proof before you blame the hardware? Test every button once, in order, and let the readings name the fault. Last updated: 14 November 2026 | Category: Controller Testing Tools | Reading time: about 9 minutes | Tested with Chrome/Edge, Gamepad API Quick Answer Test all controller buttons online by opening the button test, pressing any button to wake the test, then pressing each button once slowly in order: face buttons, bumpers and stick clicks, D-pad, then menu buttons. Record what each press reports. A button that never flips, stays stuck, or registers twice names its own fault category. Open the button test No download. No account. Data stays in your browser. A button is a testable entity A button is a testable entity. The Gamepad API reports gamepad.buttons as an array; each button reports pressed (true or false) and value (0.0 to 1.0). A standard layout maps face buttons, bumpers, triggers, select/start, stick clicks, and the D-pad to fixed indexes; controller layouts vary, so the tester shows which index lights up for each physical press (Tier 1, W3C Gamepad API concept). Press and note which index lights up. Do not guess the index from memory. A blank test before any press is normal, because pressing a button is the Gamepad API wake interaction (Tier 1). Press any button to wake the Gamepad API. A blank test before any press is normal. The limits matter before you start. The browser sees what the operating system sees, and some menu buttons are swallowed by the platform before the page sees them. A button the browser never sees is not automatically a dead button. It may be a platform capture, and this post teaches you how to tell the difference. The W3C Gamepad API is the authority for how the browser reads buttons. Everything below follows what the API reports, not what a game shows. Six steps, every button once Six slow passes, one button at a time, cover every button on the pad. Work the steps in order. Press slowly, one button at a time, and record as you go. 1. Wake and map. Open the Button Test tool, press any button to wake the API, then press each button once slowly and note which index lights up. The standard layout is the reference; a swapped or missing index is a mapping surprise worth recording. Do not skip the mapping pass. A button that lights up the wrong index is not dead, it is mapped differently, and that changes the fix. 2. Face buttons. Press A/B/X/Y, or Cross/Circle/Square/Triangle, one at a time, watch pressed flip true, release, watch it return false. Record any that stay true (stuck) or never flip (dead). Press each one a few times. A button that fails even once in a few presses is not a pass, it is intermittent, and intermittent is a fault category of its own. 3. Bumpers and stick clicks. LB/RB, then L3/R3. Stick clicks are the most missed in casual testing, so this post calls them out by name. L3 and R3 are buttons, reported in the button array, and a failed click is a button fault, not drift. Press each stick straight down until you feel the click, then release. If the click never registers, record it as a button fault and test the stick movement separately. 4. D-pad. Four directions, then diagonals. The D-pad reports four directions and their diagonals. Test each direction separately, then the diagonals, and record any direction that never registers. A D-pad that registers up and down but never left points to a D-pad fault, and that fault gets its own guide later, named in text only until live. 5. Start, select, and menu buttons. Press once each; note any that the browser or OS swallows. Platform capture is a browser limit, not a controller fault. Some buttons are captured by the browser or the OS before the page sees them, and no retest in the browser will make them appear. Record them as “platform capture, not a fault” and move on. 6. Record. One line per button, pass or fail, plus the index it reported. Retest after any fix from the button fix guide and compare the two runs. If a button never registers, see the button fix guide. Without a before number you cannot tell later whether a fix helped. Press every button once and listen for the click. Note any button that feels stiffer or softer than its twin on the other side. Stiffness asymmetry is a wear signal, not a calibration item. The membrane and microswitch test notes are in the next section. What a button is made of, and why it matters Most face buttons are membrane, a rubber dome over a contact. Some pro controllers use microswitches, a click you can feel. The test note is simple. Mushy feel with missed inputs points at membrane wear. A dead click or double fire points at a microswitch fault. Qualitative only, no strength numbers. One physical press can register twice. That is contact bounce. A double registration on a single clean press is a bounce fault, not user error. The double-input fix detail belongs to its own post later, and this post names it as a category only. The input versus output boundary matters too. LB and RB are buttons, digital input. LT and RT are analog axes, trigger input, 0.00 to 1.00 (Tier 3 house convention). Xbox impulse triggers are output inside the trigger. DualSense adaptive triggers are input resistance, not vibration, and neither counts as button input. This post tests the input side. The trigger post owns the analog side in depth, and this post does not teach trigger testing. Read the result: what each reading means The reading names the fault category, not the fix. Use
Switch Pro Controller Not Detected? Fix Guide
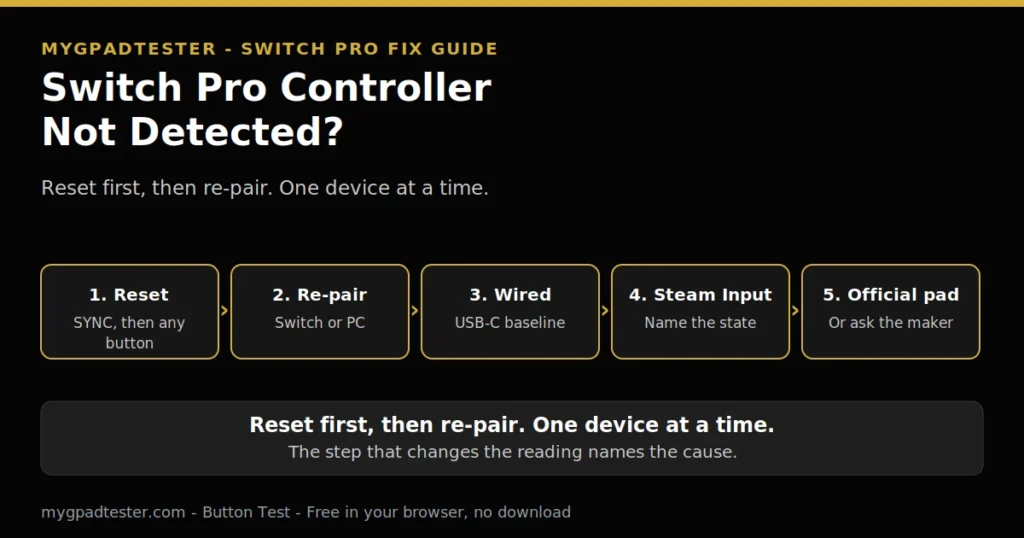
Switch Pro Controller Not Detected? Fix Guide Your Pro Controller pairs with the Switch fine, but the PC tester shows nothing? Or it worked yesterday and today the tester stays blank? The pad is probably fine. Nintendo pairs its controllers its own way, and one missed step leaves the tester with nothing to read. Last updated: 13 November 2026 | Category: Controller Testing Tools | Reading time: about 8 minutes | Tested with Chrome/Edge, Gamepad API Quick Answer Fix a Switch Pro Controller that is not detected by resetting it first, then re-pairing it on the device you actually want to use. Press the SYNC Button once, then press any other button to power it on again. Re-pair on Switch or PC, test wired as a baseline, then check Steam Input. Retest after each step. Press a button in the button test No download. No account. Data stays in your browser. The Nintendo difference: one controller, one device A Switch Pro Controller pairs like any Bluetooth controller, but Nintendo has its own first step and its own traps. Nintendo’s own first step is the SYNC reset. The controller pairs with one device at a time, so a pad that works on the Switch needs re-pairing for the PC. It does not switch devices on its own. Press any button to wake the Gamepad API. A blank test before any press is normal. The browser cannot test what the operating system does not see. Fix the OS connection first, then retest in the browser. The browser layer that follows this post is covered in the browser-layer steps, the generic not-detected guide. This post does not repeat those five browser layers. It covers the Nintendo steps only. Fix it the Nintendo way: five steps in order Five Nintendo steps fix most detection failures, in this order. Work the steps in order. Each one ends with a retest, because a fix you cannot measure is a guess. 1. Reset first with SYNC. Press the SYNC Button once, then press any other button on the controller to power it on again. This is Nintendo’s own first step (Tier 2, Nintendo Support). Then press a button in the button test and check whether the pad appears. One warning from Nintendo Support itself: pressing the SYNC Button interrupts the controller’s wireless communication with the console; reconnect by pressing one of the directional or A/B/X/Y Buttons (Tier 2, Nintendo Support). So if you press SYNC and the pad drops, that is expected. Press a direction or a face button to reconnect, then retest. Retest. 2. Re-pair on the target device. On Switch, go to Controllers then Change Grip/Order, hold SYNC until the lights flash, and let the console find the pad. On PC, hold the small SYNC button next to the USB-C port until the lights flash, then add the device from the PC Bluetooth settings (Tier 3 typical). Windows lists it as “Pro Controller”, sometimes as a generic Input device, so do not panic at the name. If two entries appear, match by pairing time and pick the one that appeared when you pressed SYNC (Tier 3 typical). If the pad is still paired to the Switch, remove that pairing first, because one device at a time means the old pairing wins. Retest. 3. Wired baseline: plug it in. Plug a USB-C cable into a direct port and try another port if nothing appears. The PC installs it in the background as Pro Controller or generic HID (Tier 3 typical). Wired working but Bluetooth failing means the Bluetooth layer, not the controller. Wired failing too means the problem sits lower, cable, port, or driver, and the wireless steps will not help until that is fixed. Retest. 4. PC software layer: name the Steam Input state. Steam offers Switch Pro Configuration Support in its controller settings, giving native mapping, rumble, and motion in Steam games. Without Steam, Windows sees the pad as a DirectInput controller, so games expecting XInput may not pick it up unless Steam Input is running (Tier 2 vendor concept, Valve). Test in two states, in order. First with Steam Input off, then with it on, and note which state the tester sees. Close DS4Windows and other clients before retesting, because a second remapper in the path can grab the pad and hide it from the browser. Retest. 5. Honesty fork: official pad or third-party pad. This post covers the official Pro Controller. When using a third-party controller, rather than one made by Nintendo, direct inquiries to the manufacturer (Tier 2, Nintendo Support). Third-party Switch controllers vary, and their pairing steps are the manufacturer’s, not Nintendo’s. Joy-Con is a separate entity with its own sync button location. This post does not teach Joy-Con pairing. If your Joy-Con will not pair, see the Joy-Con row in the table below, then check Nintendo’s own Joy-Con steps. Retest. Which symptom points where Each symptom points at one layer to check first. Use this table when you know the symptom but not the layer. It points at the first check, not at a guaranteed fix. For the Xbox version of this problem, see Xbox detection fixes. Symptom Most likely layer First check action Not in the PC Bluetooth list Re-pair layer Hold SYNC until the lights flash, add from PC Bluetooth settings, retest Paired before, not found now Reset layer Press SYNC once, then press any other button to power it on, retest Works on Switch but not on PC One device layer Remove the Switch pairing, re-pair for the PC, retest Works wired but not Bluetooth Bluetooth layer Re-pair over Bluetooth, check the wireless environment, retest Pairs but buttons do nothing in game Steam Input layer Enable Switch Pro Configuration Support in Steam, or test with Steam Input off, retest Prompts do not match buttons Layout layer Check the layout note below, this is a layout difference, not a fault, retest Official pad vs third-party pad Honesty layer For a third-party pad, direct inquiries to the
How to Test Controller Triggers Online
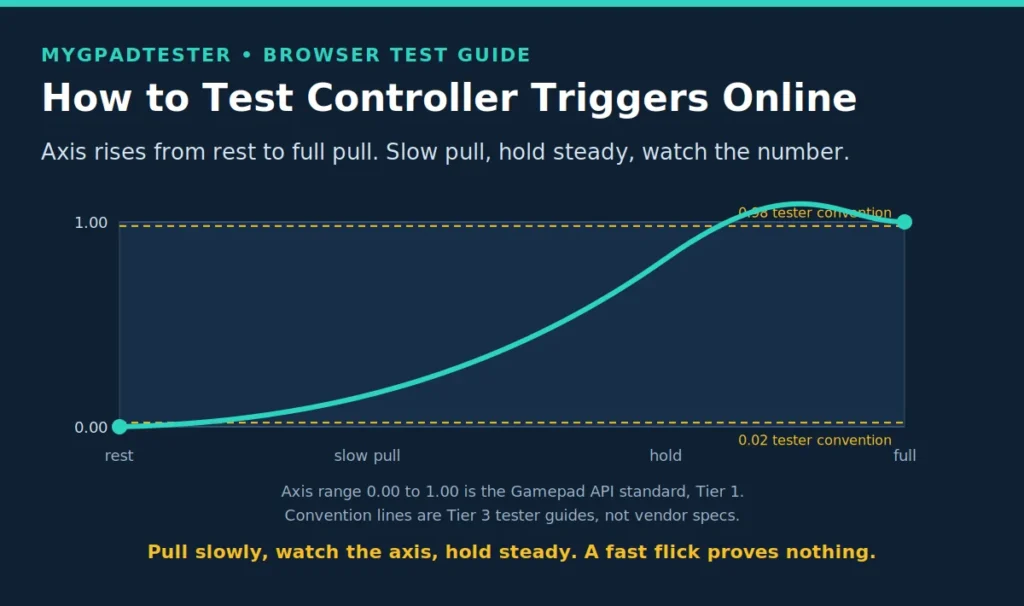
How to Test Controller Triggers Online Meta line: Last updated 13 November 2026 | Category: Controller Testing Tools | Reading time: about 8 minutes | Tested with Chrome/Edge, Gamepad API Your trigger does not reach full in game, or the axis jumps while you hold it? Test your trigger axis online in about a minute and get a number, not a guess. Read the axis at rest, pull slowly to full, hold steady, then check wired versus wireless. Quick Answer Open the trigger test in Chrome or Edge, press each trigger slowly from rest to full pull, and watch the axis value. A clean trigger rises smoothly, reaches near full, and holds steady. A browser test shows travel and stability, not spring feel or physical travel distance. Test your triggers free No download. No account. Data stays in your browser. What a trigger reading actually is A trigger is an analog input, read as an axis from 0.00 at rest to 1.00 at full pull. The browser reads that axis through the Gamepad API, which reports axes in a fixed range, so every controller speaks the same number language here (Tier 1). A clean trigger rises smoothly as you pull, reaches near full at a full pull, and holds steady while you hold it. That is travel and stability, and a browser test can show both. It cannot feel spring resistance, and it cannot measure a physical travel distance in millimetres. Two house tester conventions help you read the number, and they are conventions only, never Sony, Microsoft or Nintendo specifications (Tier 3). A rest value above 0.02 needs a check. A full pull below 0.98 needs a check. One distinction keeps this post honest. A trigger press is input: the axis value your finger creates. Vibration is output: the motors the game drives. They are different systems, so a trigger test never proves a vibration fault, and a vibration test never proves a trigger fault. One exception lives inside the trigger itself. Xbox impulse triggers are output, not input: small motors in the triggers that shake during gameplay. If impulse vibration is missing, that is a vibration fault in the trigger housing, not a trigger axis fault, so test it as vibration, not as axis travel. DualSense adaptive triggers are the other direction: input resistance, not vibration. They change how hard the trigger feels to pull. A browser test reads the axis, not the resistance, so adaptive trigger problems get their own PC fix, linked in the Next Steps. Five terms, one reading, so the number is never misread. Trigger axis: the 0.00 to 1.00 value, Tier 1 Gamepad API. Report interval: 1000 divided by Hz, nominal, not a delay (Tier 1). Input latency: the total delay from pull to game response. Jitter: variation in the reading, described qualitatively, no percent rule. Browser measurement: what the browser sees in Gamepad API data, not a physical pull to photon measurement. No site sample size or measured range is claimed here. The 0.02 and 0.98 lines are Tier 3 tester conventions, not vendor specifications and not site measurements. Trigger reading guide Reading What it means Next step Rest 0.00 Clean rest, no input reported None, pull to full next Rest above 0.02 Tester convention: needs a check Clean around the trigger base, do not open the controller, retest wired Peak near 1.00 on a slow full pull Full travel reads clean Hold and check stability next Peak below 0.98 on a slow full pull Tester convention: needs a check Retest wired, then retest with no remapper Value jumps while held steady Unstable reading, not a clean hold Change one variable and retest Value returns to 0.00 on release Clean return to rest None, test the other trigger How to test your triggers, step by step Test both triggers in the same run, and change only one variable at a time. That is the whole method: one clean run, then one change, then compare. Browser and platform limits A browser test reads the trigger axis only. It cannot tell you why the axis is off, and it cannot separate a worn trigger from a platform setting on one run alone. It cannot feel spring resistance, so a stiff or mushy trigger can still read a clean axis. It cannot measure physical travel distance. What it gives you is travel and stability, and that is enough to decide your next test, not your repair. Test in Chrome or Edge, and use the same browser for both runs you compare. Firefox works for basic testing. Safari and mobile are limited for this kind of test. Troubleshooting: trigger reading faults and what to do next Match your reading to the row that fits, then retest with one variable changed before you decide anything. Problem Likely cause Fix Retest Trigger stops below full pull Worn sensor or spring, or a platform sensitivity setting Retest wired with no remapper, then check the platform controller settings If it still stops below 0.98, it is the trigger, not the setting Axis jumps while held steady Unstable reading: connection jitter, interference, or a failing sensor Change one variable: wired first, then a different port or room If it jumps wired too, the sensor is suspect Trigger reads a value at rest Rest offset fault Clean around the trigger base, do not open the controller, retest wired If it stays above 0.02, it needs a check, not a deadzone mask Trigger works on PC but not on console Platform or game layer, not the axis Confirm the axis reads clean on PC first, then check the console game settings If the PC axis is clean, the fault is the platform layer Trigger changes after a remapper update Remapper layer fault Test with the remapper closed, then re-enable and compare If the clean run is clean, keep the remapper setting that reads clean One trigger only reads badly Single trigger fault Test the other trigger as the control, same steps, same
How to Test Controller Vibration Online
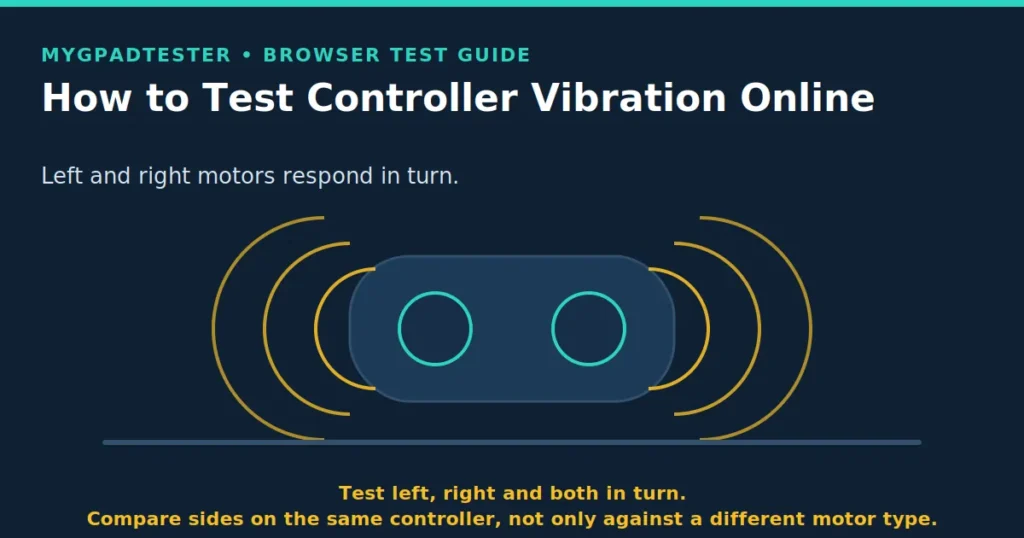
Meta line: Last updated 14 November 2026 | Category: Controller Testing Tools | Reading time: about 12 minutes | Tested with Chrome/Edge, Gamepad API Your controller does not vibrate, or one side is weaker than the other side. Test controller vibration online free, with no download, and learn whether the motor, the setting, the game or the browser is the cause. Quick Answer Open the vibration test, connect the controller, and trigger left, right and both motors in turn. If both sides respond evenly, the motors work. If one side is dead or much weaker than the other side, note it, check settings and game support, then retest. A browser test can confirm vibration, but it cannot certify motor strength. Tool CTA Test your controller vibration free No download. No account. Data stays in your browser. Data Table 1: Vibration test record Fill this record in as you test. Leave a field blank if you have not tested that side yet. A blank field is honest. A guessed result is not a measurement. Side tested Result Setting checked Retest result Left Right Both Trigger Result options for each row: responds, weak, uneven, no response. Setting checked options: game setting, system setting, browser permission. Copy this table into your notes, or use the blank record image below. What vibration is, and what it is not Vibration is output, not input. The controller receives a vibration command and its motors move. That is the whole distinction, and it shapes every result in this guide. A trigger press is input. It sends an axis value when you press the trigger. A vibration command is output. It tells a motor to move. Do not mix the two, because a trigger can read correctly while its vibration fails, and the reverse can also be true. Xbox impulse triggers are output inside the trigger. They feel like trigger vibration, but they are still output. The trigger area has its own small motors. They respond to a vibration command, not to your press alone. DualSense adaptive triggers are input resistance, not vibration. The trigger pushes back as you press it. That pushback changes how the press feels. It is not a vibration motor moving, and it is not tested by a vibration test alone. Most controllers use dual rumble motors. Each motor spins an off centre weight. That spin is what you feel as rumble. Switch HD Rumble uses linear actuators. They move in a straight line and give a finer feel. Xbox impulse triggers add small motors in the triggers. DualSense uses voice coil haptics. They give a finer and wider feel than a plain spinning weight. Feel differs by motor type. A Switch controller will not feel like a DualSense controller. An Xbox controller will not feel like either of them. That difference alone is not a fault. “Weaker than my other controller” is not proof of a fault on its own. Compare the same controller over time. Compare left and right on the same controller. Those two comparisons are fair, because the motor type stays the same. A comparison across different motor types is useful for feel only. It is not a fault test. A browser test can only test what the browser and the device allow it to trigger. Some browsers and some mobile devices limit or block vibration output. iOS and Safari are limited in this area. If no vibration appears, check the browser and device settings before you call the motor dead. Can a browser test vibration? Partly, not fully. A browser test can confirm that vibration triggers. It can confirm that both sides respond. It cannot certify motor strength against a lab standard. It cannot replace a console or game test where the browser cannot trigger the motor. Use Chrome or Edge as the reference browsers for this test. Firefox gives basic support. Safari and mobile give limited support. If a result looks odd on Safari or on a phone, retest on desktop Chrome or Edge if you can. That retest tells you whether the limit was the platform or the controller. Motor type Where it sits What it feels like in plain words Input or output Dual rumble ERM motors Left and right grips in most controllers A spinning weight feel, broad rumble Output Switch HD Rumble linear actuators Inside the Joy-Con and Pro Controller grips A finer, more precise feel Output Xbox impulse triggers Small motors in the triggers Rumble felt in the trigger area Output DualSense voice coil haptics Inside the DualSense grips A finer and wider feel than a plain spinning weight Output Before you test, the 5 checks that change the result Five checks change the result, so do them before you judge a motor. A missed check can look like a dead motor. A clean check list gives you a result you can trust. How to test controller vibration online, the test procedure Test left, right, both and triggers in turn, and record each result. Work in that order, because a side by side comparison is what separates a setting fault from a motor fault. How to read the result, motor, setting, game or browser The pattern across sides and games tells you more than one single result. Read the pattern first, then pick the next check. Do not replace or repair a motor on one unrecorded result. Result Likely cause Next check No vibration anywhere Setting off, game does not support vibration, browser cannot trigger it, dead motor, check in that order Settings, then a second game, then desktop Chrome or Edge, then the fix post One side only Motor or wiring on that side Retest that side wired, then the fix post for that controller Weak on both sides Low power, intensity setting, game setting, motor wear over time Charge, settings, then compare with the same controller over time Vibration in one game but not another Game support and game setting Check the silent game setting, then test a second game
How to Test and Visualize Your Controller’s Deadzone
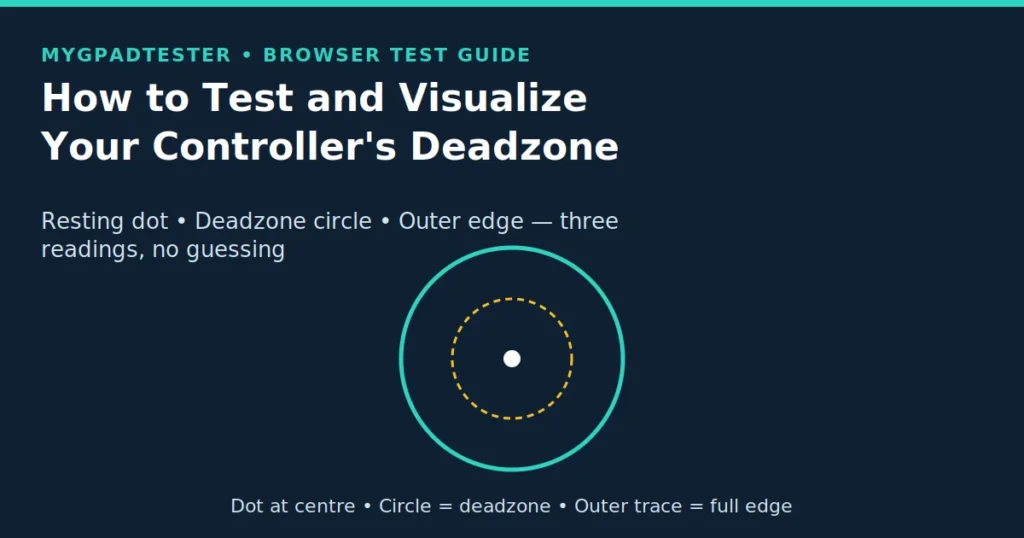
How to Test and Visualize Your Controller’s Deadzone Subtitle: Visualize your deadzone free, in minutes: read the resting dot, the circle, and the outer edge, and set the smallest deadzone that actually works. Meta line: Last updated 13 November 2026 | Category: Controller Testing Tools | Reading time: about 8 minutes | Tested with Chrome/Edge, Gamepad API Supported controllers: PS5, Xbox, Switch, PC. Your character moves on its own and you want to see the stick’s real position? Test it in minutes. You already know what deadzone is from the foundation guide. It is the centre area a game ignores, so a resting stick does not move your character. This post does not repeat that foundation. Its job is practical. Read three things in order. Set a value that hides resting movement without killing fine aim. Prove it with a retest. Quick Answer Open the deadzone test, leave the stick untouched, and read the resting dot first. Then move the stick slowly to the edge and trace the outer circle. Set the inner deadzone just above the resting value, test left and right sticks separately, and retest. Do not raise both sticks because one drifts. Tool CTA Use our free deadzone test: big button, full width on mobile. No download. No account. Data stays in your browser. Data Table 1: How to read the visualizer Caption: How to read the visualizer. The dot decides the next step: clean rest means set a small deadzone; steady offset means test drift first; clipped edge means check the outer setting. All values here are tester guides, not manufacturer specifications. What you see What it means What to do Resting dot at centre, inside a small circle Clean rest; small deadzone is enough Set inner deadzone just above the resting value, then retest Resting dot outside a small circle, steady in one direction Drift, not just deadzone Test drift first with the Stick Drift Test; deadzone is only a bridge, not a fix Dot jumps randomly at rest Debris / loose stick / failing sensor Clean carefully, retest wired, then repair vs replace decision (later guide, not linked yet) Outer edge trace is round and complete Stick reaches full deflection evenly No outer-deadzone change needed for full speed Outer edge trace has flat spots / clipped corners Worn or square-gated stick, corners clipped Consider outer deadzone 0.95–0.98 as a starting guide so full turn speed triggers reliably without maximum force: labelled as a guide, not a spec Before you test: 4 setup rules A visualizer reading is only as clean as the setup behind it. Get these four right before you record anything. How the visualizer reads position: the browser reads stick position through the W3C Gamepad API, which reports each axis from −1.0 to 1.0 (Tier 1 specification: https://www.w3.org/TR/gamepad/). It plots that position as a dot, draws the deadzone circle, and traces the outer edge. It does not show the game’s final response curve: see the Limitations Box below. How to test and visualize deadzone: the procedure This is the HowTo for this post. Each step gives the action, what you should see, and what it means if it does not happen that way. Work through all seven steps for one stick, then repeat for the other stick. Do not skip the retest: a single reading is a snapshot, not a setting decision. Circle vs square: reading the shape on the visualizer A circle reading treats distance the same in every direction. A square or cross shape means diagonals reach the edge differently from straight tilts. So a diagonal can feel different at the same tilt size. If diagonals feel wrong, check shape and axial handling before raising the size. Axial deadzone decides whether the X axis and the Y axis are judged separately or together. Raising size will not fix a shape problem. Full square-deadzone guidance for a specific game belongs to a future game-specific post that is not linked here yet. No per-game settings table is given here. Smallest stable deadzone: the setting rule Set the smallest value that hides resting movement in the tester and in a game, then stop. That is the whole rule. This guide records a before/after pair instead of handing you one universal number. Raising further only loses fine aim precision. Once resting movement is hidden, there is nothing left for a larger deadzone to hide, except wear, which it cannot repair. If a small value does not hide movement, the problem is drift or wear, not the setting. Go back to the drift test. Do not keep raising deadzone. If you need an inner deadzone above about 0.20 to hide movement, treat that as a stop rule, labelled as a tester guide and not a manufacturer specification. The stick is worn enough to repair, not just tune. That 0.20 figure is a guide threshold, not a vendor spec and not a guarantee about any particular controller model. One separation sentence: deadzone is a position threshold, not timing. A stick that feels unresponsive at small tilts is a deadzone question. A stick that feels late is a lag question. That question is covered by the input-lag guides named in Next Steps, not repeated here. Step Record Resting value, left stick X / Y at rest, untouched 30-60 seconds Resting value, right stick X / Y at rest, untouched 30-60 seconds Inner deadzone set, left Smallest value that hides rest movement Inner deadzone set, right Set separately, do not copy left Retest Same method, after restart / wired, before vs after pair Limitations Box What this test cannot tell you: Troubleshooting Caption: Troubleshooting table. Change one variable at a time, then retest. Never declare a controller broken from one number. Problem Cause Fix Resting dot steady outside the circle Drift, not deadzone size Test drift first using the Stick Drift Test tool; deadzone is a bridge only Dot jumps randomly at rest Debris / loose stick / failing sensor Clean carefully, retest wired, then consider repair
What Is Controller Deadzone?
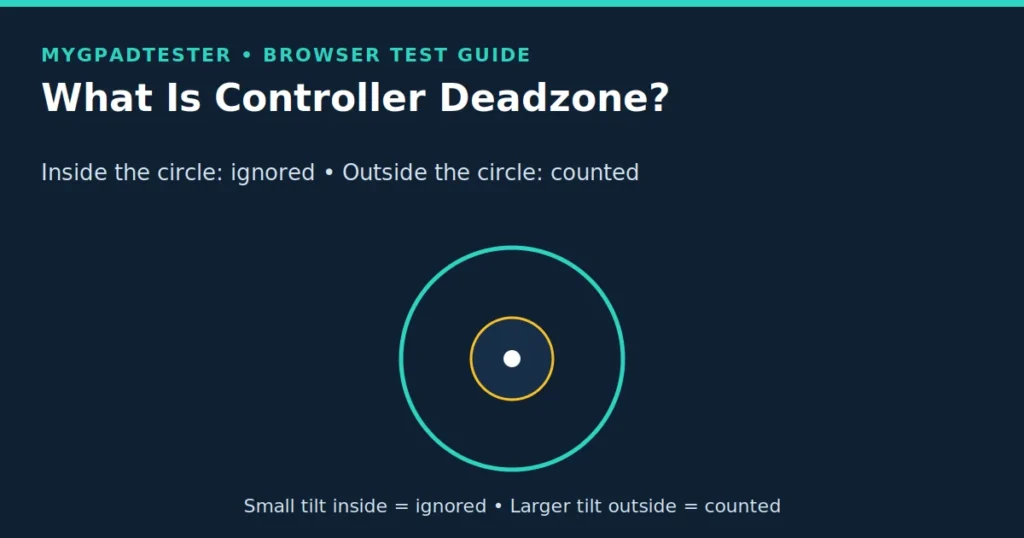
What Is Controller Deadzone? Subtitle: Deadzone is the small centre area a game ignores. A resting stick does not move your character. Small tilts do not feel twitchy. Free, no download. Meta line: Last updated 14 November 2026 | Technical Guides | Reading time: about 8 minutes | Tested with Chrome/Edge, Gamepad API Supported controllers strip (plain text): PS5 · Xbox · Switch · PC You tilt the stick slightly and nothing happens, then it jumps? Your deadzone is too large. Quick Answer Controller deadzone is the range of stick movement around the centre that a game ignores. A small inner deadzone stops a resting stick’s tiny sensor noise from moving your character. A larger deadzone hides more movement, but it also makes small, precise tilts unresponsive. Deadzone hides drift: it does not repair it. Tool CTA Use our free deadzone test No download. No account. Data stays in your browser. Data Table 1: The three deadzones Deadzone What it controls What happens if it is too small / too large Inner deadzone Where input starts: tilt below this is ignored Too small: resting noise / mild drift moves the character. Too large: small precise tilts do nothing, aim feels dead in the centre Outer deadzone Where input reaches 100%: tilt beyond this is treated as full Too small: full speed with little tilt, hard to control finely. Too large: you must push to the edge with force to reach full speed Axial deadzone Whether X and Y are treated separately or together Separate (axial): a small X tilt alone still counts, even if Y is centred. Together: diagonal handling changes, and straight vs diagonal feel differs Table caption: Deadzone sets the start point. Sensitivity sets how fast input grows after it. Response curve sets the shape of that growth. They are three different settings: changing one does not replace the others. Why a resting stick needs a deadzone at all A controller stick never reports a perfect zero at rest. Its sensor reports tiny values even with your thumb off the stick. That comes from sensor noise. In some sticks, small variation in the centering spring can also add to it (Tier 3, typical, not a vendor specification). The W3C Gamepad API reports stick axes from −1.0 to 1.0 (Tier 1). So even a tiny resting value is a real number the game can see. Without any deadzone, that noise would move a character, drift a camera, or nudge an aim point untouched. A small inner deadzone is therefore normal, not a fault. The game filters noise before it becomes movement. The Day 1 house range for normal resting noise is ±0.02–0.03, a house tester convention, not a Sony, Microsoft, or Nintendo specification. That is the whole job of a deadzone: ignore the centre, count the rest. Inner vs outer vs axial, in plain words Think of a stick’s travel from the centre to the edge. Inner deadzone decides where that travel starts to count. Outer deadzone decides where it reaches full speed. Axial deadzone decides whether the X axis and the Y axis are judged separately or together. Inner deadzone is the one most players mean by “deadzone”. At 0.05, the first 5% of tilt from the centre does nothing. That helps when a stick rests slightly off-centre. But it harms fine aim when set so high that small tilts never register at all. Small tilts include nudging a crosshair and creeping around a corner. Outer deadzone is the opposite end. At 0.95, you reach 100% input at 95% of full tilt, so the last 5% of travel adds nothing. A low outer deadzone makes full speed arrive early and feel twitchy. A high one forces you to push hard to the edge. A worn stick that no longer reaches the edge can feel as if it never reaches full speed. Axial deadzone is the subtlest of the three. With it, X and Y are treated separately. A small tilt purely to the left still counts as X movement even if Y is centred. Without it, the game judges the combined tilt. So diagonals may be treated differently from straight movements. If straight movements feel clean but diagonals feel odd, shape and axial handling are the first suspects. Deadzone size alone is not. Deadzone shape: circle vs square vs cross Shape decides whether the ignored area is the same distance in every direction, and that is why diagonals can feel different from straight movements. Size is only half the story. A circle ignores the same distance in every direction. Push 0.05 straight or diagonally and the same rule applies, so straight and diagonal tilts behave the same way at the same distance from the centre. A square or cross shape changes how diagonals behave. A diagonal tilt reaches the edge sooner in a square shape than a straight tilt does. Imagine a square drawn around the centre. The corners of that square are farther from the centre than the middles of its sides. A diagonal push heads toward a corner. So it can cross the boundary earlier than a straight push of the same length. The result is that diagonals can feel faster. They can also reach full input differently from straight movements, even with the same deadzone number. That is why some games, in particular Rocket League, care about shape, not just size. Full square-deadzone game guidance belongs to a future game-specific post, so it is not covered here. Shape does not change the stick itself: it changes how the game reads its position. Shape Straight tilt Diagonal tilt Circle Ignored until the same distance in any direction Ignored until the same distance as straight tilt Square / cross Ignored until the edge in that direction Can reach the edge sooner than a straight tilt, so diagonals feel different Deadzone vs sensitivity vs response curve: do not confuse them These three settings are often changed as if they were one setting. They are not, and changing
How to Measure Controller Input Lag Online

How to Measure Controller Input Lag Online Subtitle: Measure your controller’s lag contribution in the browser, in a 10-second sample, and read four numbers, not one average. Last updated 14 November 2026 | Category: Controller Testing Tools | Reading time: about 9 minutes | Tested with Chrome/Edge, Gamepad API Supported controllers strip (plain text): PS5 DualSense · Xbox Series · Switch Pro · PC · Generic pads: browser test, no download. You press a button and the action on screen feels late. Here is how to measure which link is slow. Quick Answer Open the input lag test, connect wired first, then move a stick or press a button continuously for 10 seconds. Read minimum, average, 95th percentile and maximum browser intervals together. A browser test measures the controller’s contribution, not true end-to-end lag. The game and display add their own time on top. Tool CTA Use our free input lag test: Test your input lag free No download. No account. Data stays in your browser. How to read the sample: the four numbers that matter A clean browser sample gives you four numbers, and you need all four before you judge anything. Most lag tests fail the reader the same way: they show one average and stop. One average hides what you actually feel in a game. It hides the occasional spike, the dropped gap, and the run that is fine for nine seconds and terrible for one. Polling interval is one slice of the chain (the report interval between controller reports). It is covered in the polling guide linked below. This post is not that guide. Its job is narrower. Run one clean 10-second sample. Read the four numbers correctly. Compare wired against wireless with the same motion. Then you can say whether the controller link itself is slow, spiky, or fine. Number What it tells you What to do with it Minimum interval Best single gap in the sample; shows the link at its cleanest Do not judge by this alone: it hides spikes Average / median interval Typical gap during continuous input; the comparison number Compare wired vs wireless, same browser, same motion 95th percentile (p95) Gap that 95% of samples beat; the “almost worst” case If p95 is far above average, the link is spiky, not just slow Maximum interval Worst single gap; a dropout or stall One max spike = retest; repeated max spikes = change a variable Jitter / spread How wide min-to-max is; stability, not just speed Stable and a few ms slower feels better than fast and spiky Before you start: the setup that changes the number A lag sample is only as clean as its setup. Two runs with different setups are not comparable. That is how readers reach false conclusions. For example, a claim that Bluetooth is much worse, from one messy wireless run against one clean wired run. Use desktop Chrome or Edge first. They are the reference browsers for this method, because Gamepad API timestamps are most consistently available there. Firefox is usable for basic testing. Safari and mobile browsers are limited for full Gamepad API work. If you test there, record that fact with the result. The browser is part of the measurement. Connect by USB first, into a direct port, not a hub. Use a data cable, not a charge-only cable. Charge the controller first. A hub, weak cable, or low battery can each add variable time. The control run must be as clean as possible. Close overlays, remappers, and background load for the clean run. That includes Steam Input remapping, DS4Windows, and screen-recording overlays. Use the same motion for every run. That is the most important rule in this post. If you rotate a stick slowly on the wired run and flick a button fast on the wireless run, you have changed two variables at once. Then the comparison tells you nothing. Pick one motion (continuous stick movement, or steady repeated button presses) and repeat it exactly. Note browser, operating system, connection, and motion with each result. One short reading aid, and only one. Polling interval is the report interval between reports, calculated as 1000 ÷ Hz. So 125Hz means a report interval of up to 8ms. 1000Hz means a report interval of up to 1ms. That is maths, not a measurement of your controller. It explains part, only part, of any interval you see. For the full polling explanation, see polling interval is one slice of the chain. How to measure controller input lag online: the 10-second method Follow these seven steps in order. They are the HowTo for this post, and the visible step text below must match the HowTo schema word-for-word at publishing. That is the whole method: 10 seconds of continuous input, four numbers, a wired control run, a wireless comparison run, and a wired repeat. Everything after this section is reading those numbers correctly, not adding new steps. Why a result near 16–17ms does not automatically mean a slow controller A result near 16-17ms does not automatically mean a slow controller. This is the most common misreading in browser lag testing, and it has a simple mathematical cause. At 60 frames per second, one frame lasts 16.7ms (1000 ÷ 60, maths). A browser test reports intervals through the browser’s frame loop. That loop uses requestAnimationFrame, the mechanism browsers use to time animation to the display. It can therefore show intervals clustering near 16.7ms even when the controller is not slow. The cluster reflects frame timing, not controller delay. The same maths explains why the cluster moves on a faster display. 120Hz = 8.3ms. 144Hz = 6.9ms. 240Hz = 4.2ms. Those are 1000 ÷ refresh rate, maths only. None of those figures is a lag measurement. They are frame intervals. They explain why a result near 16ms on a 60Hz display and near 8ms on a 120Hz display can describe the same controller. Judge by the wired-vs-wireless gap and by p95 and max, not by a single average near
What Is Controller Input Lag?
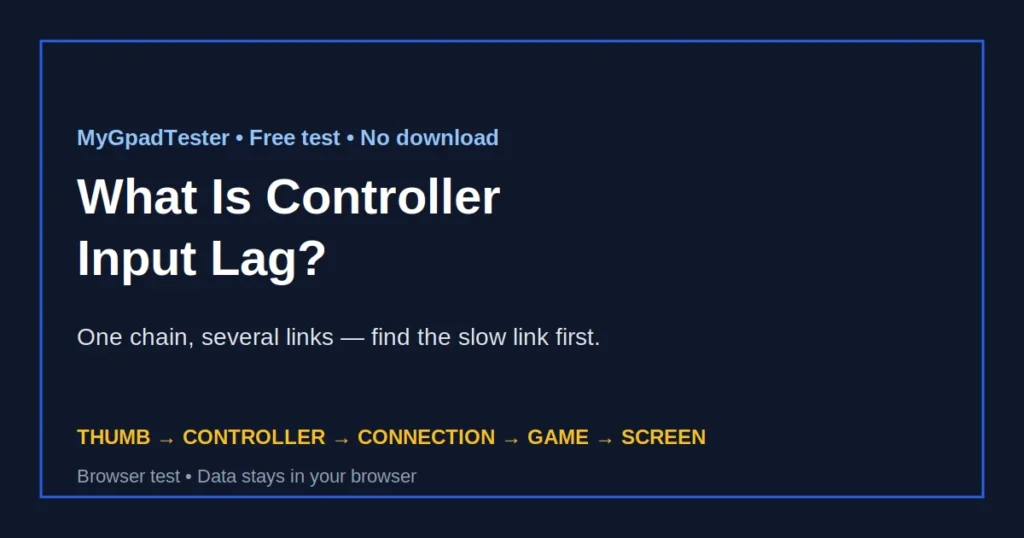
You press a button, but the action on screen feels late? Find which link in the chain is slow, before you blame the controller. Input lag is not one number. It is a chain from your thumb to the screen. The slow link is rarely the one you blame first. Last updated: 14 November 2026 | Category: Technical Guides | Reading time: about 13 minutes | Tested with Chrome/Edge, Gamepad API Quick Answer Controller input lag is the total delay from moving a stick or pressing a button to seeing the action on screen. It includes polling, connection, game processing and display time. A browser test can measure the controller’s contribution, but it cannot measure true end-to-end lag: that needs the game and display too. Test your controller’s contribution to lag: Input Lag Test Browser test only: it does not measure your monitor or game engine. No download. No account. Data stays in your browser. The free test shows what the browser can see: how controller reports arrive over time. It cannot watch your thumb move or pixels change, so it is a comparison tool, not a certificate. The lag chain: one delay, six links Controller input lag is the total delay from moving a stick or pressing a button to seeing the action on screen. Think of input lag as a chain. The slowest link shapes what you feel. A new controller will not fix a television with Game Mode off. A faster monitor will not fix an unstable wireless link. Link What it adds How to test it Controller sensor + firmware Time to turn thumb movement into a report Test the same controller on another PC or console; if the problem follows the pad, it is the pad Polling interval Report interval: 125Hz = up to 8ms, 1000Hz = up to 1ms Polling test wired vs wireless, same motion, same browser Connection (USB / Bluetooth / dongle) Wireless scheduling, interference, low battery, hub Lag mostly wireless, or only on one connection type OS / software layers Remappers, overlays, background load, drivers Lag after installing a new tool, or only with overlays on Game processing Input handling, frame queue, VSync, frame cap, render load Lag in one game only, or only at max graphics / VSync on Display Response time, Game Mode off, motion smoothing, refresh rate Lag in every game, on a TV without Game Mode, or at low refresh Each link can add delay. The slow link is found by changing one link at a time, not by guessing. Polling interval is maths (1000 ÷ Hz). The other links have no single house ms number here, because they depend on game, display and method. That is deliberate. Different methods, games, refresh rates and displays give different end-to-end totals for the same controller. So no single “DualSense = Xms, Xbox = Yms” table is presented as a house fact. Input lag vs polling rate vs response time Polling rate is how often reports arrive, in hertz (Hz), one slice of latency, not the whole delay. See what polling rate means in Hz: What Is Controller Polling Rate? for the full explanation. Polling interval is the time to the next report: 1000 ÷ Hz. At 125Hz the maximum report interval is 8ms, at 250Hz 4ms, at 500Hz 2ms, at 1000Hz 1ms. That is the controller’s share of the report interval, not total input lag. Input lag, or latency, is the total thumb-to-screen time, including polling, connection, operating-system and software time, and game processing time, and display time. If any link is slow, the total is slow, even if polling is fast. Response time in display specifications usually describes how quickly a pixel changes colour. It does not describe how quickly a controller input reaches the screen. A fast pixel response does not, on its own, prove low controller lag. Drift is not lag. Drift moves without input, lag delays input. A drifting stick can feel laggy, but it is a rest-position fault. If your character or camera moves without you touching the stick, test that separately with Stick Drift Test. Where controller lag usually comes from Check in this order: connection first, then polling interval, then software layers. Bluetooth schedules communication in windows. Interference, weak battery, or a crowded 2.4GHz environment can add delay and variability. A wired USB link, or a dedicated 2.4GHz dongle such as the Xbox Wireless Adapter for Xbox controllers on PC, is usually steadier than generic Bluetooth. It is not an overclock, just a more predictable link. Polling interval is next. For a wired controller it is set by the USB HID interrupt endpoint, which declares how often the device reports. The browser reads those reports through the Gamepad API, as described in the W3C Gamepad API specification: https://www.w3.org/TR/gamepad/. Software layers are third. A remapper such as Steam Input or DS4Windows, an overlay, or heavy background load can sit between controller and game. An outdated driver can do the same. If lag appeared after installing a new tool, check that layer before replacing hardware. Rule: fix the connection before you blame the polling rate. An unstable link adds far more felt lag than a modest polling difference. What a browser test can and cannot measure Can measure: Gamepad API timestamp gaps, browser-observed intervals, compare wired versus wireless in the same browser with the same motion, measure stability or jitter over a short test. Jitter means how much the timing wobbles between samples, so a wide spread means an unstable link even if the average looks fine. Cannot measure: the instant your thumb moves, the instant pixels change, game engine time, display time, or true end-to-end lag. A reaction-style cue test measures your reaction plus the whole system, not controller lag alone. True end-to-end measurement needs hardware, such as a high-speed camera, a photodiode, or an oscilloscope. For the controller’s browser-observed contribution only, use these bands as a guide, browser-estimate only, not end-to-end totals: Under 8ms is excellent. 8-16ms is normal. Above 16ms,
How to Test for Stick Drift Online

Your character or camera moves even when you do not touch the stick, so test for stick drift online free in 60 seconds, with no download, and get a number, not a guess. Last updated: 14 November 2026 | Category: Controller Testing Tools | Reading time: about 13 minutes | Tested with Chrome/Edge, Gamepad API Quick Answer Put the controller flat, leave both sticks untouched for 30-60 seconds, and read X and Y at rest in the drift test. Near 0.00 is healthy. A steady offset at 0.05 or higher in the same direction is drift. A random flicker that disappears is noise, not drift: repeat the test before you decide. Test your stick drift free: Stick Drift Test No download. No account. Data stays in your browser. House verdict scale: use this scale for every reading Use this scale for every reading. It matches the foundation drift guide. These are typical tester values, Tier 3 (typical / community-tested), not a Sony, Microsoft, or Nintendo specification. Rest reading Verdict What to do 0.0000, flickers within ±0.02-0.03 Normal sensor noise, not drift No fix needed; retest only if symptoms return Consistent offset ±0.05-0.10, same direction Measurable mild drift Clean/calibrate check, smallest stable deadzone as a bridge, retest, monitor Consistent offset above ±0.10, or creeping in one direction Clear drift Clean/calibrate, then repair vs replace decision (full guide later, not here) Random jumps, even untouched Debris / loose stick / failing sensor Clean carefully, retest wired, then repair vs replace decision A steady offset matters more than a single flicker. One glance is not evidence: repeat the test. Some other testers use above 0.15 as their replace threshold; this site uses the scale above for consistency. Before you test: 5 mistakes that fake a drift result Also close remappers that can grab the pad for the clean test: Steam Input and DS4Windows are the common ones. Re-enable afterwards if used. Check warranty before opening anything. This guide does not recommend opening the controller. If later considering cleaning inside the stick housing or any repair, check warranty terms first, claim it first if it applies. Opening can void it. How to read the result: left vs right, X vs Y, steady vs creeping The browser drift test reads stick positions through the Gamepad API. Each stick reports X (left-right) and Y (up-down). Axes are normalised from -1.0 to 1.0, with 0.0000 at centre under the standard mapping. The tester shows the reported axis value, not the physical track. Calibration error can look like drift until retested. A potentiometer stick reads position from a wiper moving against a resistive pad, and wear changes the resting resistance so the controller reads movement at rest (Tier 2, iFixit authority explainer). Do not average the two sticks. A left-stick offset of 0.08 and right-stick 0.00 is a left-stick problem. Direction matters. A steady offset in the same direction on repeat is classic drift. A value growing over 60 seconds is stronger evidence. Random jumps, changing direction, or disappearing on retest is not a drift verdict yet. A dot inside the deadzone circle is not automatically a pass. Deadzone is the centre area a game ignores. If the dot sits inside that circle in the tester but the character still moves in-game, the problem may be a game deadzone or response-curve setting, not tester drift. Confirm in a second game and a second tester. Circularity is a different check from this rest test. It is not measured here, and it is not needed to answer: do I have drift at rest? Confirm it a second way Confirm a browser result with a second check before deciding. Platform built-in checks: PS5 Test Input Devices or Calibrate Controller Sticks; Xbox Accessories stick test; Switch Calibrate Control Sticks; Steam Test Device Inputs or calibration; Windows Game Controller Settings as a secondary PC check only. Authority references by name only: Sony PlayStation Support, Microsoft Xbox Support, Nintendo Support. The W3C Gamepad API specification is the authority for how the browser reads axes. No exact support-page URL is linked here, because a guessed support URL would be worse than no link. If the second check agrees, drift is confirmed. If it disagrees, retest wired, same surface, same browser, and check for a game-specific deadzone setting before opening anything. How to test for stick drift: the 60-second method Troubleshooting: what your result actually means Never declare a controller ‘broken’ from one number. Change one variable, retest, and only then decide. Symptom Likely cause What to do Drift only in one game Game deadzone, sensitivity, or profile setting Check that game’s settings, then retest in the tester and in a second game Drift disappears wired but appears on Bluetooth Wireless jitter can make a borderline reading look worse; Bluetooth does not create potentiometer wear, wired is the control Retest wired as the control; judge the stick from wired, wireless quality separately Drift after cleaning Cleaning helps debris, not a worn track; if drift returns, it is wear, not dirt Clean carefully (safety note below), retest wired, then repair vs replace decision One stick only That stick’s axis or sensor Test that stick’s axis separately; do not replace the whole controller on one reading Controller not detected Gamepad API dormant, port/cable, browser, or remapper grabbing the pad Press a button, refresh, try another port/cable, use Chrome/Edge, close remappers Value jumps randomly, even untouched Debris, loose stick, or failing sensor Clean carefully, retest wired, then repair vs replace decision Safety note for cleaning, read before any cleaning step: Check warranty first. Power off and disconnect before cleaning around the stick base. Use compressed air. Use only a small amount of electronics contact cleaner if comfortable using it. Do not flood the module. Do not use WD-40 or household cleaners. Stop immediately if the battery is swollen, hot, or damaged. Do not open the controller in this how-to. Cleaning here means external, careful cleaning only. If other faults show up alongside drift, check the nine failing signs
How to Check and Measure Controller Polling Rate

Peak Hz looks high, but your controller still feels uneven in game, so check your controller polling rate free in 60 seconds, with no download, and learn to read the real result, not just the peak number. Last updated: 14 November 2026 | Category: Controller Testing Tools | Reading time: about 11 minutes | Tested with Chrome/Edge, Gamepad API Quick Answer Connect your controller, open the polling rate test, press any button, then move a stick continuously for 20–30 seconds. Read average Hz, peak Hz and jitter together. A browser result is a comparison, not a lab certificate: it shows how often the browser sees fresh input, capped by your display refresh, not your controller’s true USB hardware rate. Use our free polling rate test. No download. No account. Data stays in your browser. How to read the result Read all three numbers together. A single peak number, on its own, tells you almost nothing about how a controller will feel in a game. Number What it means What to do with it Average / median Hz Typical rate during continuous movement; compare across runs Compare wired vs wireless, same browser, same motion Peak Hz Highest brief reading; does NOT prove the controller stays there Ignore a single peak; judge by average + stability Jitter / interval spread How steady the gaps between updates are; wide spread = unstable link If jitter is high, change cable/port/connection, then retest Browser-observed vs hardware Hz Browser reads via Gamepad API, gated by frame rate; hardware USB rate can be higher Compare connections; do not certify hardware Hz Polling rate is also called report rate. The time between reports is the polling interval, also called the report interval or update interval. Tier 1 maths: interval (ms) = 1000 ÷ Hz. So: 125 Hz = up to 8 ms. 250 Hz = up to 4 ms. 500 Hz = up to 2 ms. 1000 Hz = up to 1 ms. That maths is not a measurement. It is how you read any Hz number. For the meaning of Hz, see what polling rate means in Hz. This post is the procedure, not a repeat of that definition. Before you start: 5 setup rules that change the number How to check controller polling rate: the 60-second method Reader Record Table: your numbers only, blank on purpose Run Connection Average Hz Peak Hz Jitter Browser Wired Wireless / dongle No controller was run as a claimed site measurement for this guide. What a normal result looks like: by connection, not by marketing A normal result is a steady average inside the typical range for your controller and connection, judged by stability, not by one peak. Reading guide: the three most-searched controllers below. For the full house table, see what polling rate means in Hz. All ranges below are Tier 3, typical, browser-observed ranges, not manufacturer specifications. Controller Typical wired (Tier 3) Typical Bluetooth (Tier 3) Note PS5 DualSense / Edge ~250 Hz native, up to 1000 Hz only with PC tools, wired only ~125–250 Hz 250 Hz wired is normal Xbox Series X/S, One, Elite Series 2 ~125 Hz ~125 Hz, lower and more variable on Bluetooth 125 Hz wired is normal; no reliable overclock Nintendo Switch Pro ~125 Hz ~125 Hz Stable, not high-Hz A fault is instability: wild jumps, long dropouts, or a number far below the range for your connection. Confirm it after changing one variable and retesting. On Windows, most pads reach the browser through XInput (Xbox-style) or DirectInput (older/generic) over USB HID. The USB endpoint declares a polling interval (bInterval). The W3C Gamepad API specification is the authority reference for axes normalised to −1.0 to 1.0 and update timestamps. Microsoft Xbox Support and Sony PlayStation Support are the authority sources for firmware guidance. They are named here only. No deep URL was verified, so none is linked. Why your browser number can look lower than the hardware rate The browser does not read the USB bus directly. It reads Gamepad API timestamps, gated by the page’s frame loop (requestAnimationFrame). On a 60 Hz display, the browser-observed rate can sit near 60 Hz even if hardware is higher. The page only gets a new frame about every 16.7 ms. On a 144 Hz or higher display, the same controller can show a higher number. So this guide never promises 1000 Hz in a browser on a 60 Hz display. A DualSense showing ~60 Hz in a browser may reflect the frame gate, not a 60 Hz hardware rate. The safe line is: browser-observed, compare like with like, do not certify hardware Hz. Does higher polling increase CPU usage? At 1000 Hz that work is common on modern PCs; at 8000 Hz it rises sharply, so lower the rate and retest if you see stutter. No specific CPU measurement is claimed here. Troubleshooting: what your result actually means Never declare a controller “broken” from one run. Change one variable, retest, then decide. Problem Likely cause Do this, then retest Xbox stuck at 125 Hz Normal 125 Hz HID rate (Tier 3) Normal. Use the Xbox Wireless Adapter for steadier wireless. DualSense 250 Hz wired, box said 1000 Hz Typical native Windows rate 1000 Hz on PC usually needs DS4Windows/HIDUSBF, wired only. Hz jumps wildly Cable, port, hub, interference, low battery, background load Change one variable at a time, retest after each. Bluetooth much lower than wired Expected; Bluetooth is lower and more variable Judge the ceiling from wired; judge wireless from Bluetooth-versus-dongle. Controller not detected API dormant, wrong cable/port, remapper grabbing pad Press a button, refresh, try another port/data cable, use Chrome/Edge, close Steam Input/DS4Windows. See the existing Xbox controller not detected page: Xbox Controller Not Detected. Number drops when sticks are still Bluetooth power-saving throttling Move continuously. A still-stick drop is expected, not a fault on its own. Advanced, PC wired only, not for Xbox, does not change console behaviour: Overclocking gets only this paragraph; full steps belong to a future guide.